I love a great vignette on a table top.
You know the type... several different objects/decor, raised up at different levels to show off each treasure.
Earlier this year, I took a trip to Williamsburg, VA, and saw this stand.

I loved it, but know that I didn't want to pay the price point BECAUSE I could totally make it myself.
I also didn't want the larger piece of wood that makes the top part, but instead wanted a "shiplap" inspired topper.
So I got to work.
First stop was Lowes.

I grabbed this simple pine craft wood for $4.06.

Then I grabbed 2 packages of these large craft finials for $2.98 each.
Total investment out of pocket = $10.05
The rest of the supplies I already had on hand.

I needed to make sure that the finial had the screw point in order to make it secure for the topper.

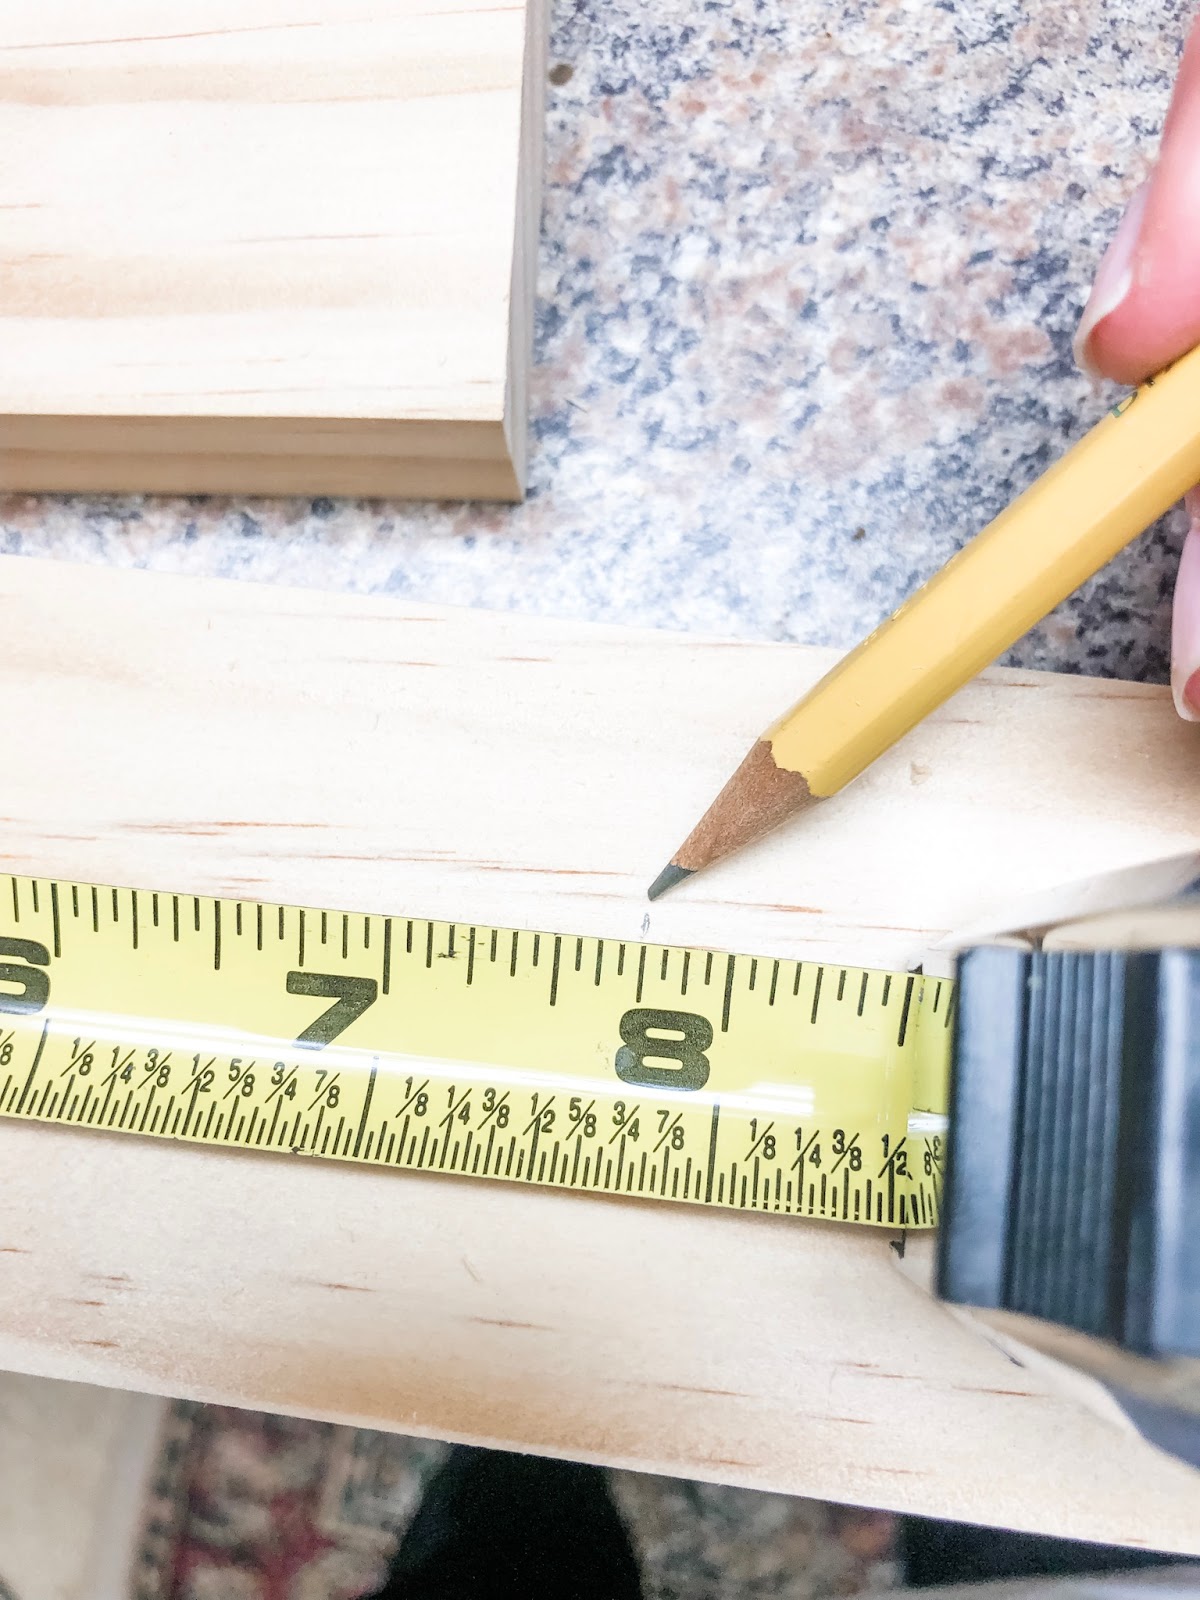
I cut the wood board into 8-inch lengths, for a total of 3.

When cutting a long piece, make sure that you chop it on the correct side of your line. For the cut above, I had the longer side of the board to the left of the saw blade, so I needed to cut on the left of the marked line.


Once I was done, I lined the 3 boards up to make sure that they were as close to the same 8-inch length as possible. I used a 120 grit sandpaper to smooth all the edges.
I also left a short bag between each board, as this was the "shiplap" idea I was going for. When assembled, those gaps are part of the aesthetic.

While the 3 boards were "settled" how I wanted them, I measured across the gaps to find my desired width. I tweaked it a bit to measure at 7.75-inches.
I then cut two 7.75-inch lengths from the remaining board (yes, it's still the same piece) to create the anchor pieces for the bottom of the topper.

I lined them up as well to make sure they too were as close to the same lengths.

I took one of the 7.75-inch pieces and laid it across the 3 8-inch pieces. This was what is called a "dry fit." I wanted to make sure that it was exactly how I wanted it to be prior to permanently adhering it.

Once I was satisfied, I used Gorilla Wood Glue to fix it to the 3 boards.

I repeated that with the other side and remaining board.
Because I used glue, I was able to gently move the 8-inch boards back and forth so that the gaps were as even as possible from the top view as well as the side views.
I LEFT THIS TO DRY FOR A GOOD 2 HOURS.

After it dried, I had this topper, ready for the finial feet.

I took one of the finials and gauged the depth of the screw.
Now you can see why I added the 7.75-inch pieces along the back. First, I needed to support the gapped 8-inch pieces, BUT, I also needed the depth of 2 widths of wood to accommodate the depth of the finial screw.

In order to mark the drill hole exactly correct on each corner, I used a little trick with a post-it note.
I placed the sticky note square with the corner and then used the screw on the finial to pierce a hole.

Here's the result.
To make this work correctly, you need to use the same corner point on the corner points of the 3 other edges. This means that you rotate the sticky note as you go around to each corner to mark.

Here it is on the opposite corner. I just used a pencil to make a mark on the wood.

I measured the length of the screw on the finial.

I used painter's tape on my drill bit to mark that depth as well. This allows me to NOT drill too deep.

As soon as the tape reached the top of the brace piece, I backed out of the hole.

I lightly sanded it to remove any splinters.

After all the holes were drilled, I screwed in each finial.


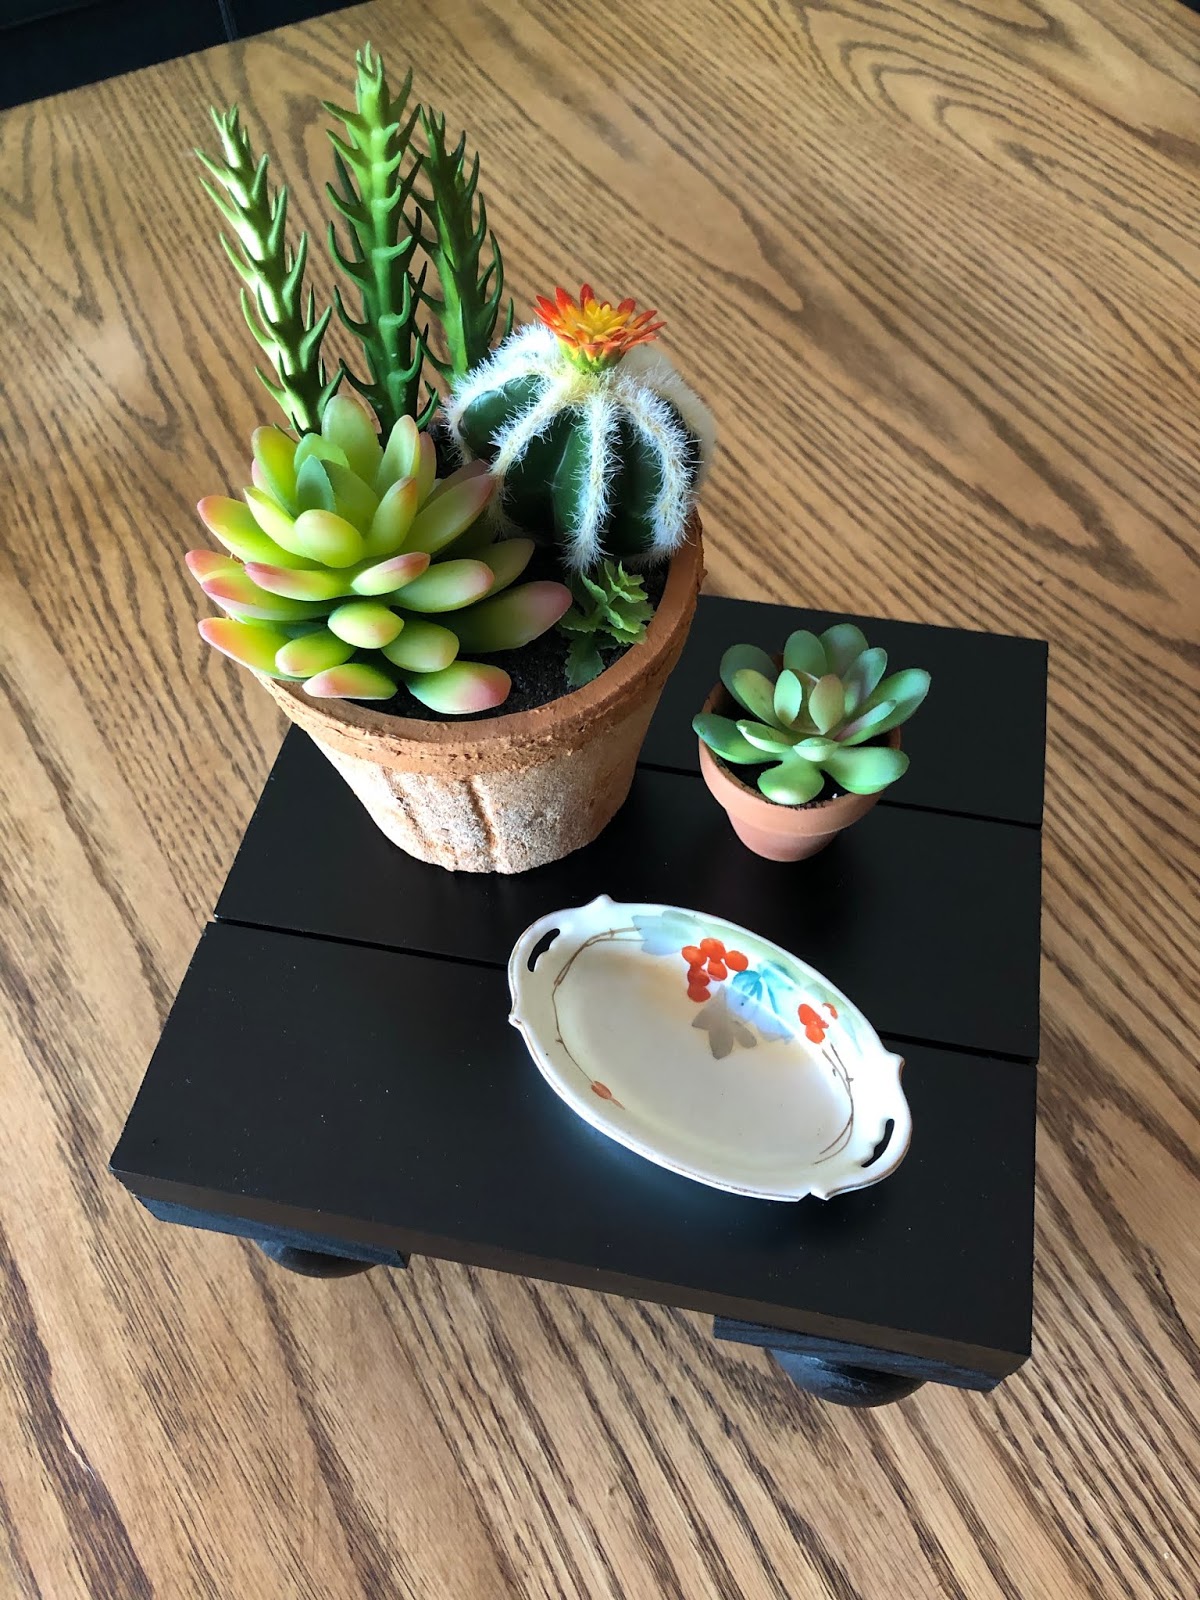
And this was the result. Cute, huh?
But I wasn't done.

I didn't want to stain this stand. I wanted to paint it black and had two cans of leftover spray paint in my stash.

I painted the first coat with the Valspar Flat Black. I used it as a base so the wood would not absorb the second satin coat.

My second coat was satin black by Rustoleum. I made sure to paint parts with a light spray, let dry, then flip around to cover all the nooks and crannies.
And then it was done!
I styled it for these photos because it's going to be making the trek to California for our daughter's apartment.
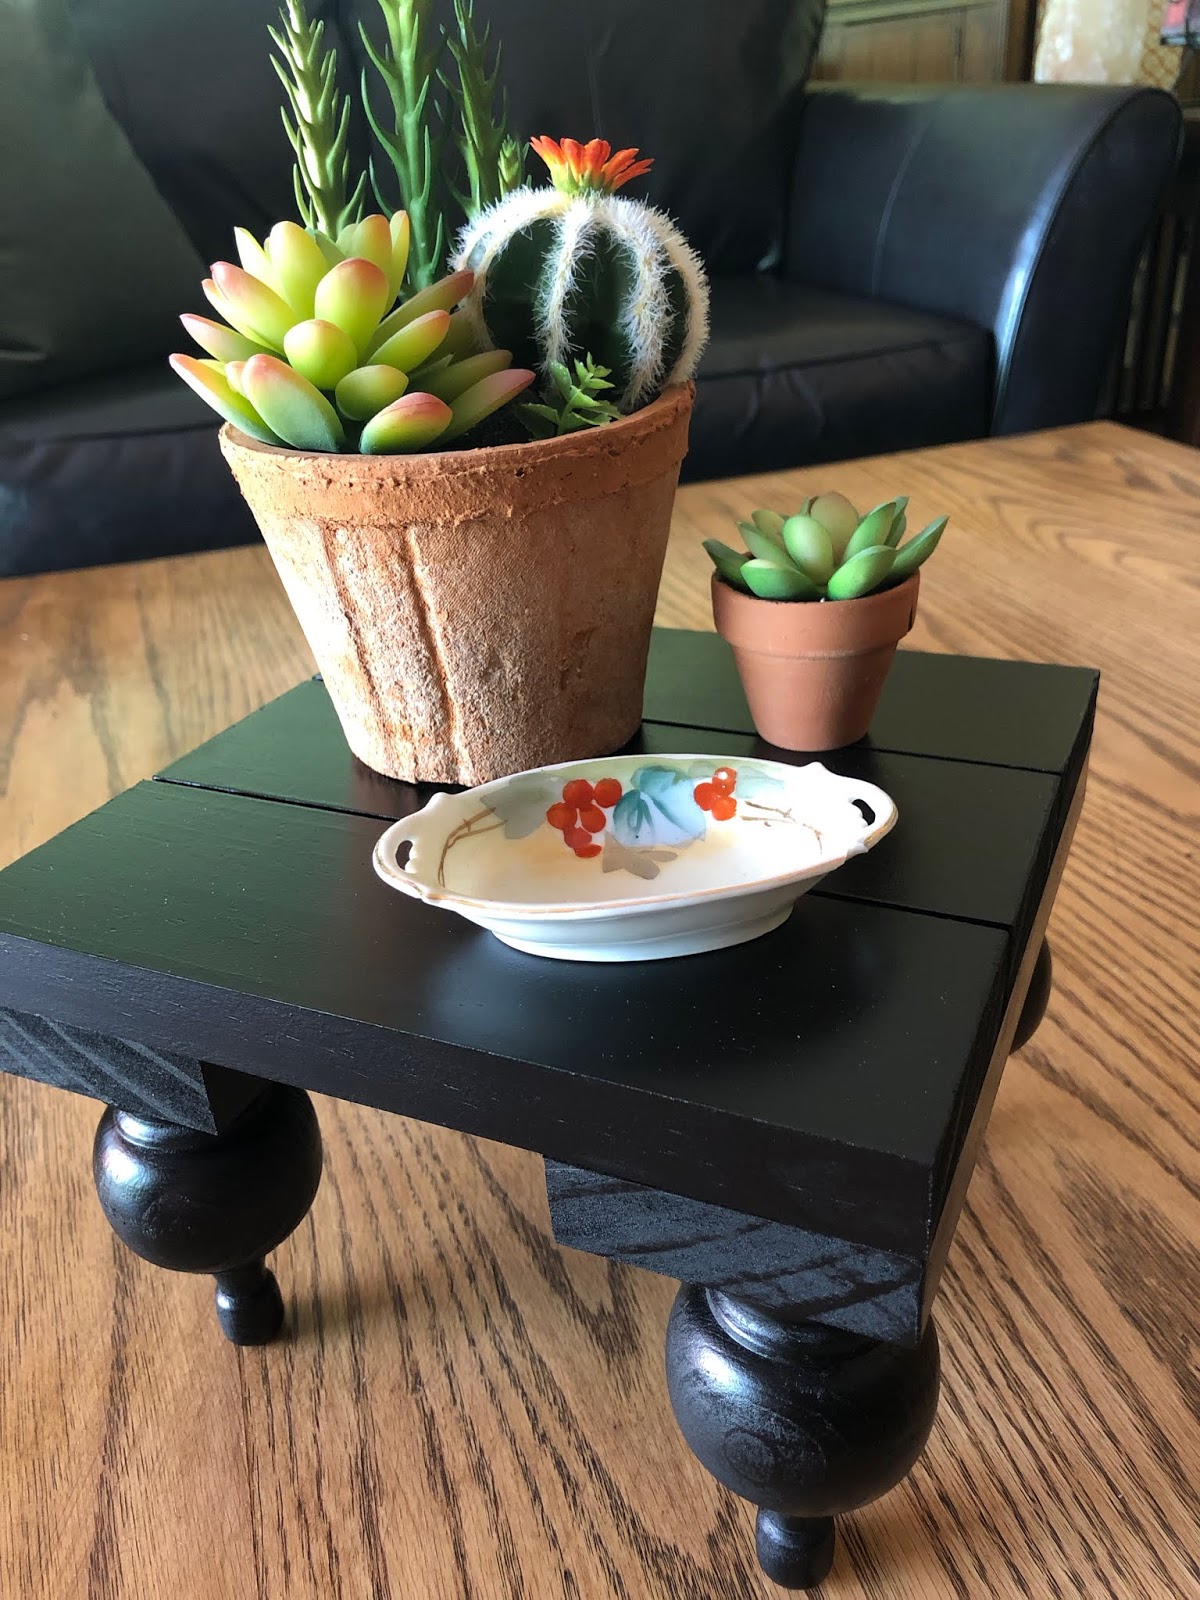
I just love how crisp and neat the black spray looks, and that it adds another elevated dimension to any tabletop.
It would look just as nice in any other color, or even stained.
The total time invested, minus any of the drying times for glue and paint was about 2-3 hours.
It's an easy project to make at home even if you don't have a table saw. You can have your local hardware store cut it for you, or use a hacksaw.
Definately a rule breaker project!


Post a Comment