Tuesday, April 28, 2020

Sewing Tea Towels from Real Towels

Yes, I am looking for things to do every day while sheltering in at home.

I had taken my sewing machine out to sew masks and surgical caps for our local hospital, and knowing that I would not be going anywhere anytime soon, I left it out "in case" I wanted to sew something else.

However, the problem I encountered was that most of my sewing supplies and fabrics were either long gone to the local charity shop OR were already packed in one of the boxes in our basement and garage.

Ugh.

So, in desperation, I found a "seen better days" Turkish towel that could use a bit of a remake.

And remake it I did...

Into two tea towels for my kitchen.


I cut the towel into a large rectangle, approximately 25" by 19" unfinished.  

I then used an old trick to perfectly create corners.

I measured 1.5" from the corner of an index card, in both directions, and marked it with my pen.

I then measured 1.5" from the corner to the center and made a mark there as well.

I connected all the marks to make this tiny triangle.


Placing the corners and edges of the towel and triangle together, I folded over the towel to make a triangle on the edge.


I hit it with my hot iron to make a crease.


I removed the triangle template and set it aside to repeat on the other three corners of the fabric.


Using my scissors, I cut off the fabric triangle, making sure to leave a slight edge near the crease.


Now comes the easy part.

I gathered both sides of the towel and folded them over until the creases touched and created this sharp-pointed corner.

Can you see where this is going?


From here, I ironed a 1" fold all the way around the towel, making sure to do the exact same corner fold on each of the remaining three corners.


I didn't want to leave a raw edge, so I tucked under the 1" fold to create a 1/2" fold, ironing that all the way around the edges.


At the corners, the edge simply tucked itself away without adding additional bulk to either side of the toweling.


I used a pin to hold the two sides in place and then took it to my sewing machine.


My Brother sewing machine has some really fun stitches, so I decided to try out #41 using a black thread on the white toweling.


I lined up the folded hem in between the edges of the pressure foot and started sewing.


You can see the great vine pattern that emerged as I let the machine do its work.


At the corners, I simply stopped, lifted the pressure foot, turned my fabric, and proceeded down the next side of the towel.


When it was all done I had a great, decorative tea towel for NO MONEY and just a bit of my time.

This is a perfect project for even the beginner sewer as it just straight sewing and little skill knowledge.

You can make placemats and napkins using the same corner technique.

It was fun to continue to be creative when I can't get out to buy fabric right now.

I especially liked that I was able to repurpose most of the fabric from a towel that was going to end up in the trash otherwise.

It's great being resourceful in times like these!


Saturday, April 25, 2020

Easy Apple Pie

I WAS going to post about my homemade Rosemary Bread, but I decided to post about my Easy Apple Pie instead... I'll do the bread soon, I promise.

In this pandemic, we've been working hard to make great meals at home and I made a "semi-homemade" apple pie that's easy to create.


I used a refrigerated pie crust, sugar, 1 egg, 2 cans of apples in cinnamon, butter, a fork,  2 Granny Smith apples, and a glass pie plate.


I took one of the crusts and placed it in the bottom of the pan.

I made sure to spread it out over the sides of the pie plate.


I then put both cans of the apples in the bottom, over the crust.


I made sure to spread the apples all over the bottom of the crust as well.


I cut the skin off the Granny Smith's and then cut them into thin slices.


I placed them over the canned apples, sprinkling generously with the sugar; about a third of a cup.

Granny Smith's are on the tart side, so adding the sugar will help to sweeten them so the pie is not too tart.

I added some slivers of butter on top to give it some "tooth" as well.


I then placed the second crust over the whole pie, making sure it was evenly placed all the way around.


Using a sharp knife, I cut slits into the top crust.

This allows the air to circulate and not "blow-off" the top of the pie while cooking.


I did not get fancy with these cuts nor try a lattice formation.

You could do that if you wanted to, but I just didn't this go around.


I seamed the edges of the pie using the tines of the fork to "squish" them together.


I made sure to go all the way around and really create a nice sealed crust.


I cracked and beat the egg to brush over the pie so that it would have a nice golden color one cooked.


And just like that, in about 15 minutes, I had an apple pie ready to go into the oven.


I followed the temperature and time instructions on the side of the pie crust box, making sure to check the pie periodically and covering the edges so they didn't get too brown or burnt.

And just like that...


We hade dessert that was homemade for a lot less trouble than "real homemade!"

Hubby loved it and actually when all was said and done, I had only two slices.

I know exactly where the other 6 slices went!


What's great about this pie is that by nature, I am not really a great baker.

Baking requires exact measurements and lots of time and I would rather just "wing it," slap things together, and call it a day.

This turned out great and let me "wing-it" as I went.

Now THAT is breaking the rules!


Tuesday, April 21, 2020

Favorite Indoor Activities

With the awareness that we will be self-isolating for quite a bit longer, I compiled a list of activities that I enjoy doing inside.

While some of them can be done outside, these are easy things to do to help us grow during this "new normal."

1 - Reading


I LOVE TO READ!

I have read thousands of books on my iPad and have anywhere from 5-15 ebooks "open" and in some stage of reading.

Non-fiction, fiction, research-based, historical...

You name it, I've probably got something that can be found in that genre.

I also LOVE listening to books and podcasts on Audible.

When I'm cleaning or crafting, I usually have something going through my earpods to make the time go by.

What's great about having a Kindle app is that I can download books at a moment's notice and have access to millions of tomes at a time; many I read for free through Kindle Unlimited.

I've also joined the Masterclass program and have been thoroughly enjoying those "lessons" as well!

2 - Games


Now is the time to play those games you've had in a cabinet.

Swipe off the dust and take the opportunity to play a game with someone.

We found a game called DOTS and it's fun and fast and keeps our brains in check.

If you're alone, you can play games on your tech devices, even playing with others in the internet world.

Pull out the playing cards have play and old fashioned game of Solitaire.

3 - Self Care


I love a relaxing bath, a great face mask, and good deep hair conditioning, and some instrumental music.

Taking the time to "get away from it all," even in your own bathtub, is one of the great things to do at home.

You don't even need lots of "fancy" stuff.

Epsom salts, baking soda, and essential oils make for a great bathtub soak.

Egg whites for the face help to tighten and detox the skin.

Slather on your favorite conditioner, wrap some saran wrap around your head, throw on a towel over that and let your body heat work with your conditioner to make your hair soft.

Light a candle and play some of your favorite tunes.

It's a LOT LESS cheaper than going to a spa any day!

4 - Cook a New Recipe


One of my goals this year has been to try new recipes and really push myself to learn new cooking skills and techniques.

In fact, I will have an upcoming post about how that has all been going and how I am building a repertoire of new recipes. (Bread recipe will post this coming Saturday)

Cooking can be fun, but for many, it may feel overwhelming.

I recommend watching YouTube channels that specialize in easy and healthy cooking.

A simple search can help you with specific recipes or general skills.

I've realized that this pandemic has really forced us to think about how we eat at home and how we truly do need cooking skills to "survive."

As eating out is not an option and may not be an option for quite some time, eating processed foods as a regular diet is not going to be good for us in the long run.

Simple cooking skills with fresh ingredients can help you lose weight (I've lost over 12 pounds in the last 5 weeks from NOT eating out and trying new recipes), same TONS of money spent eating out, and have improved my cooking skills overall.

5 - Crafting of Hobby Skills


I am a card crafter generally, but I also sew, paint, and build.

Having a craft or even a hobby is one of the lifelong skills you can perform.

Our daughter ordered a watercolor kit from Amazon as she too is sheltering in in California.  

She took art lessons as a child and showed quite a talent for it.

I'm glad she's taking it back up during this time and exploring more ways to hone and use her talents.

If you feel like you are all thumbs with crafting, try puzzles instead.

There are tons to be ordered on the internet or check with a friend to see if you can borrow one that they've already put together.

6 - Meditation


I know that the word meditation may conjure up half-naked yogis in pretzel twisted positions chanting "OM" while facing the setting sun.

Nope!

That's not it at all.

Meditation is a quiet time to focus on deep even breathing while remaining still and relaxed.

I could do a whole post on the MANY BENEFITS of meditation, but Pinterest it and check it out for yourself.

Meditation can be different for everyone.

Take some time to sit in a comfortable chair, upright, with your eyes closed.

Take slow deep breaths in and out, regulating both with a consistent gentle rhythm.

Keep your focus on your breath.

If other thoughts pop up, push them aside and move back to your breathing.

It seems "hard" at first as other thoughts and sounds try to worm their way into your meditation but don't give up.

Try to meditate for 10 minutes until you feel like you can do it successfully.

Then add 5 minutes until you work your way up to 20-30 minutes a day.

The mental, emotional, and physical health benefits derived from 30 minutes of meditation a day are worth more than all the gold in the world.

7 - Research


I love to look up and search for things that interest me.

In fact, I'm a reader who will stop mid-sentence to look up something mentioned in what I just read.

I've literally "taught" myself about so many things by just using the power of the internet to expand my mind on something that I read or saw.

Hubby calls me "Siri Mikki" when I can talk about some obscure thing that I researched.

Researching also allows you to find other interests that you're not even aware you may have had.

Lately, I've been especially interested in fine art restoration techniques.

I'm fascinated with the restoration of hundred-year-old master paintings and turn of the century jewelry making techniques.

Of course, you can YouTube these as well as read about them.

I am planning on growing citrus trees when we move to southern Utah, so I've been recently researching species and techniques to do just that.


Perhaps this quote says it best:


My hope for my readers is that you find a new "you" in all of this confusion.

You find a way to connect to yourself and through yourself to others.

Break the old rules and invent new ones that make this world a better place!


Saturday, April 18, 2020

Easy Pandemic Pedicure

Let's face it ladies...

We're really missing our self-care service people.

Am I right?

My roots are growing out at an exponential rate, my facials are non-existent, and I WAS in desperate need of a good spring pedicure.

But, knowing that we've got quite a bit more time in self-isolation, I decided to take matters into my own hands and give myself a pedicure.

Now - let me say for the record right.  If you have a pre-existing condition such as neuropathy or diabetes, or other health issue that can be directly affected by a non-professional working on your feet, DO NOT attempt an at-home pedi unless you've been cleared by your doctor to do such.

Pedicures for those with health issues can lead to serious infections and trauma, so do not attempt it unless you've been specifically instructed to by your attending physician.

I am not a professional cosmetologist.

Okay, let's get started on this.


Gather the materials you will need.

I have had and have given myself hundreds of pedicures throughout my lifetime.

I recommend the following tools (click links to purchase if you are interested).


I also have my own cuticle moisturizer made from almond oil and essential oils.

You can also find great oils without having to DIY.

Also, have a towel and some tissues on hand for cleaning off the tools as you work to remove dead skin and cuticles.


Start by trimming the length of your nails with your nail clippers.


Then, using your nail file, gently file the nails into your desired shape.  A good rule of thumb is to shape them according to the shape of your toe tips.

Because I wanted to do a basic pedicure on my toes to get through this period of isolation, I cut my nails down fairly short.


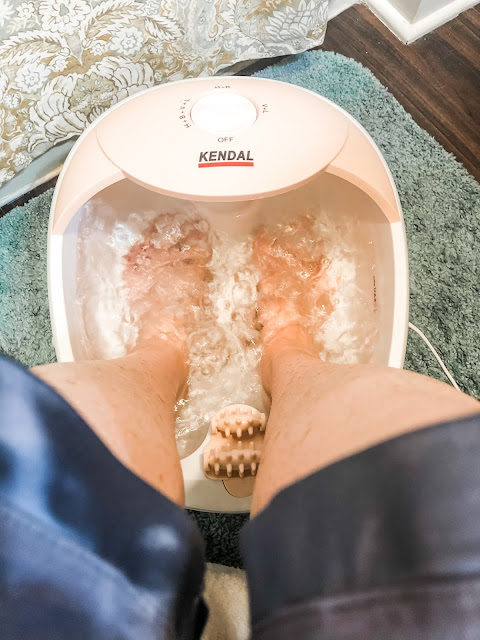
Next, you will want to soak your feet and ankles.

A few years back, I purchased this foot bath and it's an absolute dream to use.  

However, you can use a cheaper option like this one, or even hop into a shower or bath prior to moving to the next steps of your pedicure.

I don't add any foot soaks to this, but there are plenty available if you like to add them.

You can always add Epsom salts, baking soda, vinegar, or essential oils as well.

I let my feet soak for a good ten minutes.  


I pulled my feet out and patted them dry.

I used my Ped-Egg to really remove the dry skin from my heels, outer toe box, and the side of my big toes.

I won't even show you the outcome of this, but let's just say that there was A LOT of dead skin than came off.

I recommend keeping a heel rasp in your shower as well so that you can perform weekly touchups to these areas as you shower.


Now is the time to get out any "gunk" under the free-edge of your toenails.

Take your time, this can be a bit ticklish or "nippy" if you go too fast or try to dig down too far.

Make sure to get any stuff lingering near the right and left edges of the free edge.

Because your feet, nails, and the stuff are softened from the soak, it will come out so much easier than if you tried it before you soak.


Now, place a bead of the cuticle remover around the three sides of your nails.

Leave it for a few seconds, allowing the product to really work.

I love this product and have used it for years on both my toes and fingers.


The spoon pusher is a great way to push back cuticle that has crept up over the nail.

GENTLY, GENTLY, GENTLY, push back that cuticle using the edge of the pusher to work it.

You should start to see some dead cuticle on the spoon pusher as it releases itself from your nail.

You will use a tissue to clean this off as you work.


Now the cuticle nipper is a very sharp tool, so it too should be used with gentle application.

Because the cuticle is now very soft and loosened from the soak and spoon tool, you can gently snip away any dead cuticle that is left.

I recommend holding the nippers in an overhand fashion - not like scissors.

This allows you to work on your cuticles from above and not the side.

Do not work aggressively, but instead, only snip the dead cuticles and skin that you can see.


You will also want to snip a slight triangle shape from the edges of your big toenail.  This will help keep the nail from growing into the skin and creating an ingrown toenail.

We are still wearing shoes that put pressure there, so it's best to help the toes as much as possible.


At this point, you can scrub your feet, toes, and ankles (even your legs if you're so inclined) with any scrub that you have.

I used this facial scrub, but you can make your own with sugar and shower gel.  Make a paste and scrub away.

Rinse well afterwards and pat your feet dry.


I used my homemade cuticle oil to add some moisturizing to my freshly trimmed cuticles and nail beds.

I just put a drop on each nail base and massaged it into the nail and surrounding cuticle.


I then use this sample foot creme and massaged it into my feet and us my ankles, paying special attention to my heels.


My toes look great!

I skipped putting any type of polish or clear coat on my nails.

I'm not wearing open-toed shoes, so no one is going to see them.

This pedicure was simply to stop the cuticle and callous overgrowth and provide me with a bit of self-care while at home.


While this is optional, I did slip on some thick cotton peds to help the moisturizer really soak into my feet.

The socks kept me feel warm too.


And then they were done.

It's definitely not the treatment that I would get from a professional, but these times call for extreme measures.


© No Rules after 50. Made with love by The Dutch Lady Designs.