I've been working on a "redo" in my laundry area. I hadn't updated that space since we moved in 20 years ago.
REALLY...that space has gone through small rehabs and redecorations but nothing like what I had in mind.
In preparation for a "new look," I decided to make some homemade baskets.
I had the perfect starting point.
The Little Ceasar's Dog Food box of 48 individual containers of variety flavors we buy for our Dixee dog.

I started by cutting off all the top flaps with a sharp cutting blade. (Buy these in sets of 4 from the Dollar Tree)

The edges don't need to be cut perfectly, but as straight as possible makes it easier to cover.

Next, I grabbed my fabric. I used some leftover painter's drop cloth that I buy from Lowe's.
These drop cloths are super for many home decor projects because they are thick, easy to work with, and super cheap!
I placed the bottom of the box in the middle of the fabric so that when the fabric was inserted inside the box, about 2-3 inches would drape over and down the sides.

I cut triangle shapes out near the corners of the box.
This helped with ease of folding the edges over, making the edges and creases neat.

I placedace the bottom of the cut piece inside the box ( any box will do, so don't worry if you don't have the dog food box).
Folded one side up and over, easing the fabric as I went
I did the shorter sides of the box first.
I made creases along the raw edges so that it was even with the sides.
A bulldog clip helped to keep the fabric in place as I was working my way around.

Using a hot glue gun, I added glue under the fabric to the box and gently laid down and smoothed the fabric up the inside panel, over the top, and along the top edge.
I used the hot glue to hold it firmly against the box.
I recommend NOT pulling the fabric taut as that will add wrinkles and pull marks along the fabric weave. Just gently smooth it into place and it will lay just right.

I repeated this with the OPPOSITE side, then finished the front and the back.
When you lay down the front side you will cover over the slight turns in the fabric so that none of the box will be seen along the edges.

This is what I had when I finished with the fabric.

In on of my previous visits to the Dollar Tree I grabbed MANY of these Decorative Nautical Rope packs. These cover 13 feet, so do some quick math to figure out how many packs you will need.
I used 5 for one box.
This rope is very pliable and will easily work with this project.

I identified which side would be my back and started there.
Using hot glue, I attached the end of the rope to the edge of the box.

I ran a long line of hot glue along the bottom of the box and placed the rope along the line.
I wrapped it around the box until I came back to the starting point.

At that point, I gently manipulated the rope over and above that starting point and began to glue and wrap the rope around once more.

I kept on going until I reached the end. I then glued that end down to the box. I started with another piece of rope, adding a bit of glue on the tip and connected it with the glued down end on the box.
Then I continued on...
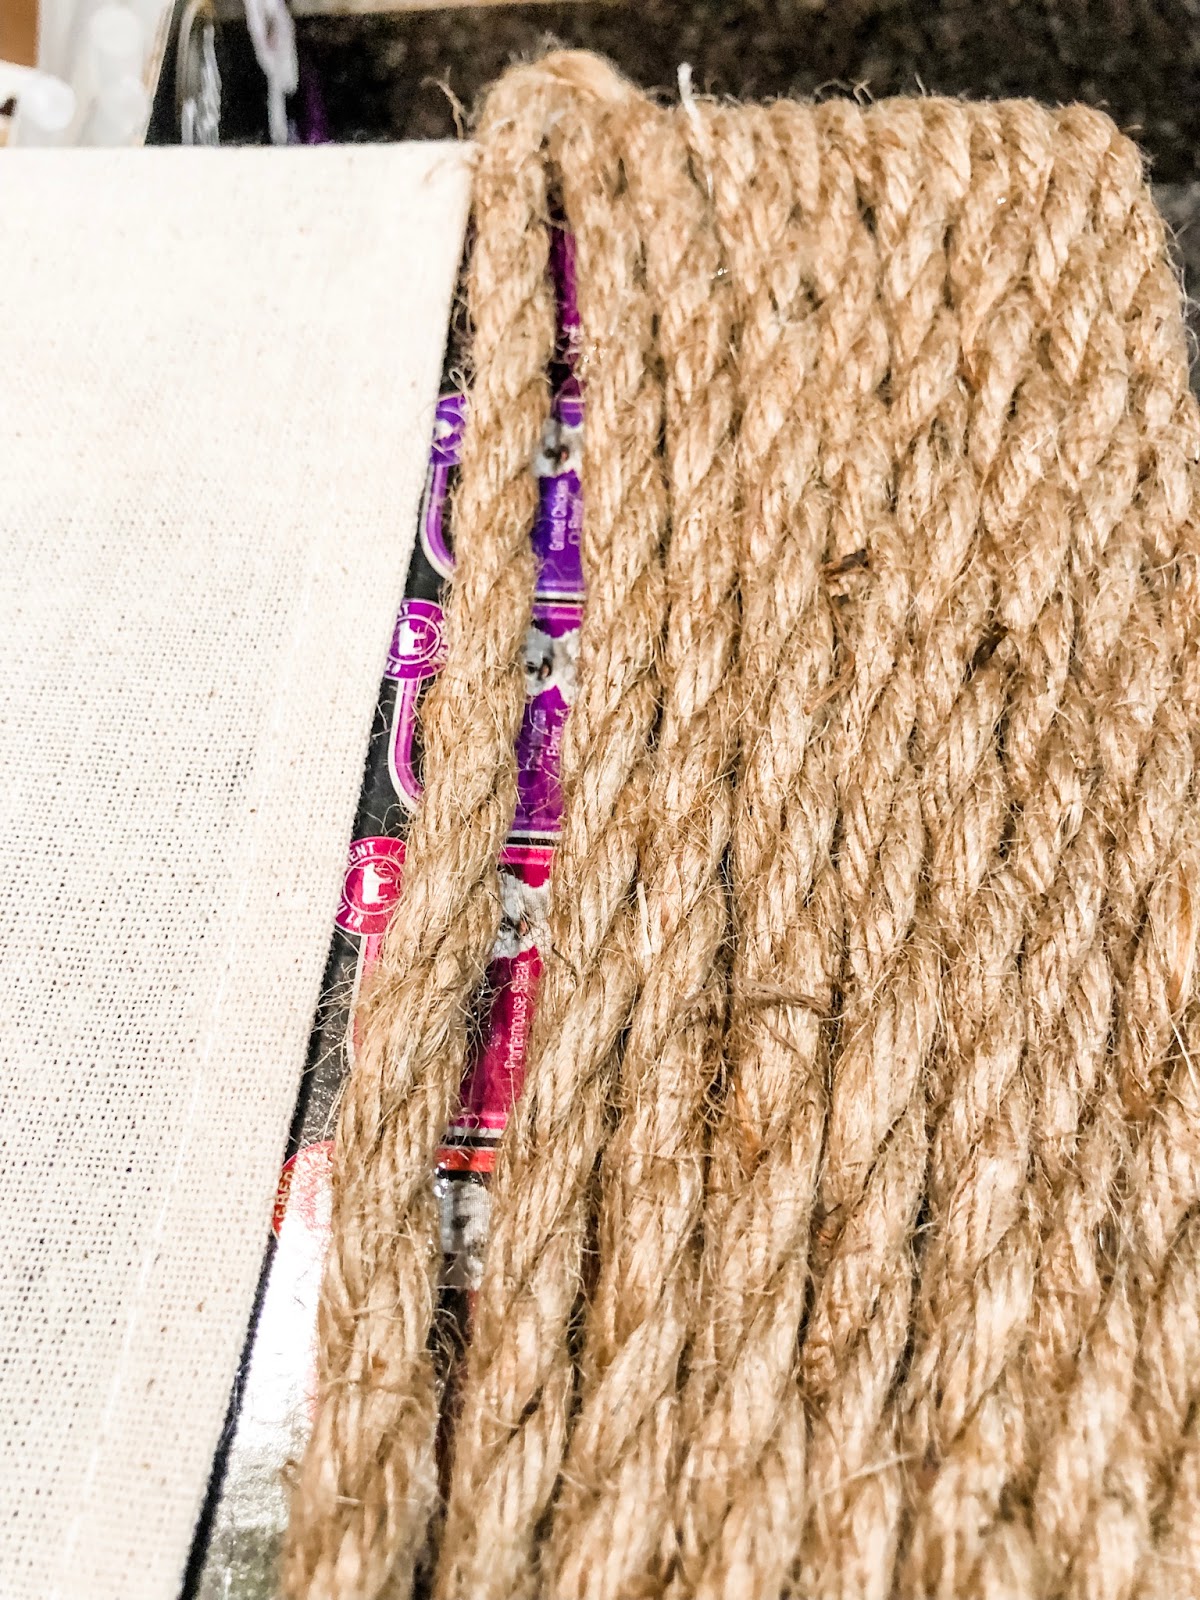
In my case, the rope started to "sag" as I butted it up against the previous length.
I wanted the top rope to be as straight as possible, so to combat this, I straightened the next wrap, leaving a bit of a gap showing.

Grabbing some of my next packet of rope, I cut off a piece the same length as the gap.
I unwrapped the three strands and hot glued one of the strands inside the gap.
You can see it here, but when looking at the box it's almost undetectable.

I had to do this about 3 times at different points on the box.

Once I wrapped all the way up and over the lining, I stopped.
I had abut 2.5 inches from the rope to the edge of the top of the box.
Isn't it looking cute?
You could be done here, but I had one more part that I wanted to add.

I picked up these black iron handles at Hobby Lobby during a 50% off week.
They didn't come with screws, so I grabbed some from my stash along with a few nuts.

I marked the center of the top of the box, over the fabric area, added some black dots through the screw holes, and glued the handle on.
Using a screw driver and a bit of hot glue, I screwed the short screws through the fabric and the cardboard, out through the other side, which was really the inside of the box.

A good 'ole Sharpie marker made the the screw black so it would blend in with the pull.

It works great to disguise the silver screw.

Even though the screws were short, a bit of the pointy end came through.
Using some hot glue and a nut, I covered that sharp end perfectly.

I was done!
Only one more to make...

I loved the way this turned out, and both of them look so good in my finished laundry area.
Stop back by next Saturday as I reveal the finished laundry area in a new post.


Post a Comment