If you've followed my blog for a bit, you know that I love everything Happy Planner related!
I think it's the thoughtfully designed, vibrant choices that HP offers and the myriad of ways you can construct planners and notebooks to suit your individual needs.
Today, I'm sharing a notebook hack, using the HP discs, some Martha Stewart products, AND, and 50% off placemat from Hobby Lobby.
Let's get started.
Currently, I have several "lists" muddying up my desk area. There's the list of current things to do. The list of home and blog projects I want to tackle. The list of activities I need to get done for some community projects. Lists, lists, lists... It's hard to know what to tackle when, especially when they all seem a jumble to me.
I realized I needed to corral them all in one place AND have them organized by importance and task.
I needed to make a disc bound notebook.

I started off with these materials. Martha Stewart disc bound lined paper packets. Martha Stewart dividers (both previously purchased through Staples using a deep discount coupon I had), a dashboard of mini sticky notes (gifted from another disc bound aficionado), and a plastic placemat from Hobby Lobby.
 |
| Up close view of the notebook paper |
 |
| Up close view of the dividers |

The placemat was in the current Spring section of Hobby Lobby and was marked at 50% off. This brought to total to $.99 at checkout.
I picked this placemat because it was so colorful and happy looking. With the thickness of the plastic, I knew that it would also be durable as well.

Here's a great view of the florals and birdies!

I used another notebook (my journal) to measure the length and width. This gave me the size I wanted for the front and back cover of the new notebook.
6.5 inches across by 9 inches down.
 |
| I created this cover with designer paper and a lamination machine |

I used a quilting ruler to draw a line down the length of the placemat.

This allowed me to remove the curved edge. I did this on both of the long sides.

Next, I used a T-Square to make my front and back panels according to the measurements.
I cut along those lines using a sharp pair of scissors.

I now had my front and back sections.

Looking at the two pieces, I had to decide which would be the front and which would be the back. I found that I liked the bird here, BUT realized that it would be covered up with a label if I used it as the front panel.

Now came the critical part of the whole project.
FLIPPING THE BACK PANEL CORRECTLY SO THAT YOUR PATTERN IS NOT UPSIDE DOWN!
Because the flowers and birds obviously have to remain facing up, when I made the back panel, I needed to make sure that I flipped it OVER from the right to the left.

This allowed my birds and flowers to be "up" which puts my punched holes now on the LEFT side of this white side.
If you just put both pieces of the placemat together with the right sides facing up, you will have an upside down back. I suggest that you place your front and backs together to make sure that you have them correct prior to punching the holes.

Next, I took one sheet of the notebook paper and using a pencil marked where the holes would be after they were punched.

The punch does not have a set mark on it for smaller notebooks. When making one, you need to look into it from the side to make sure that you are not making extra punches on the ends or you will ruin your notebook. You may even have to curl up the ends between the metal punches.
TAKE YOUR TIME here.

Once I was satisfied with the placement I punched out the holes. It took some effort, but by getting over the punch and using my full force I was able to punch through the placemat cleanly.

Here it is. The front punched and ready for assembly.
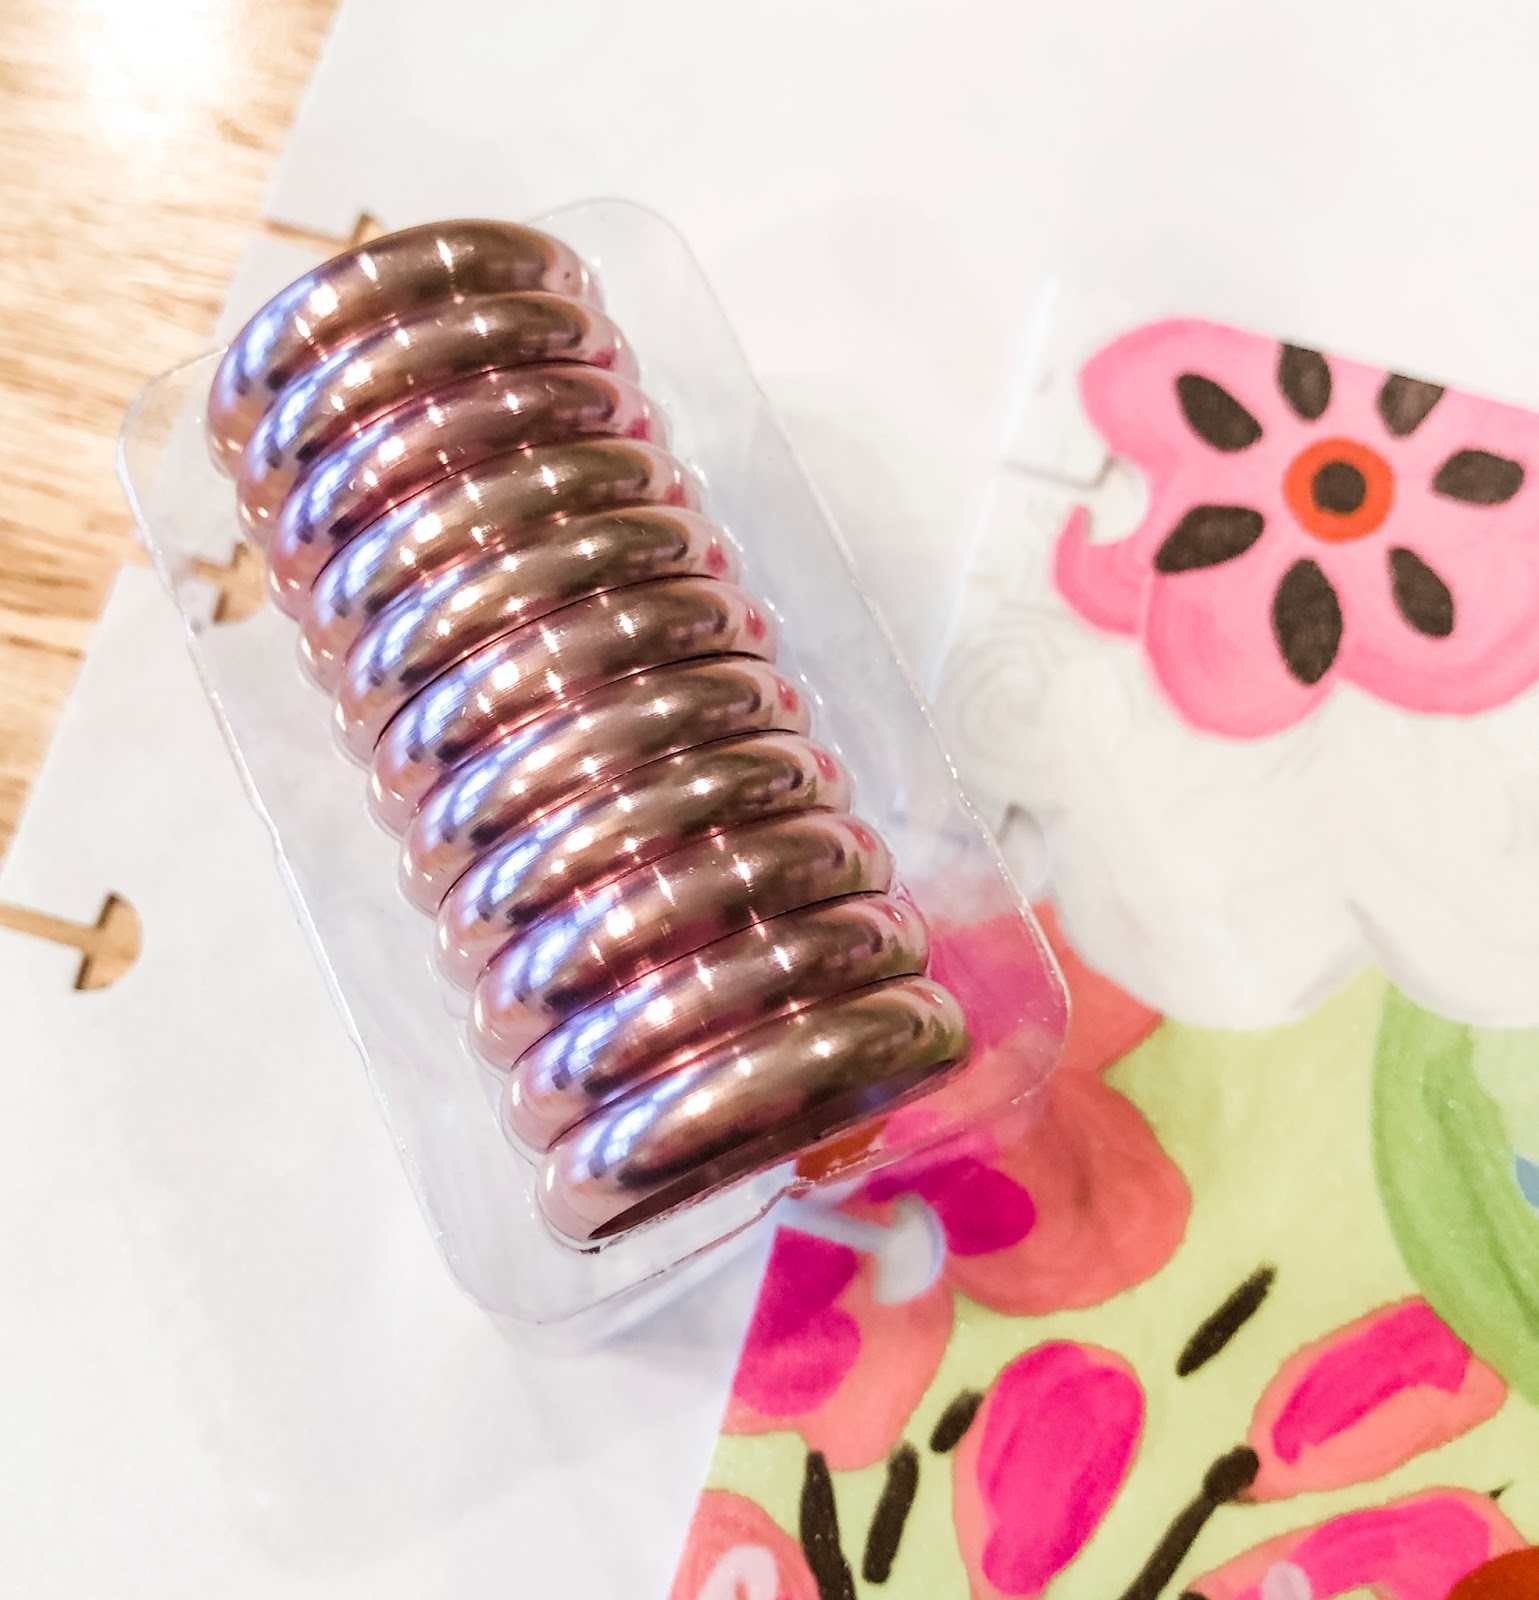
I was excited to find these Happy Planner pink metal discs at Hobby Lobby. I love pink, and these are so shiny and pretty. They really look great with the pink tones in the placemat.

I placed all the rings (8) in the front cover first, then added the notebook paper and dividers. Finally, I added the dashboard of sticky notes in the very front.

Here's the cover on the assembled notebook.
 |
| The dashboard just inside |

I added a Dollar Tree clear removable label to the front and it was done.
I loved how the birds on this part of the placemat are around the label. It really was a great placement.
I will use the dividers to separate the different task lists, adding and crossing through them as I finish.
As always, I love the versitility of the Happy Planner and disc products on the market today.
Break some rules and make your own!


Post a Comment