Holidays

Saturday, May 16, 2020

No Cost Gift Giving

This past Mother's Day was quite different than any in the past.

A lot is going on in my personal world (downsizing, prepping to move, selling our home) and in the outside world...hello Pandemic.

We've been adhering to expected behaviors by limiting our time in stores (groceries and carry out specifically) and I have not been shopping for other items no necessary to daily life.

This included shopping for a Mother's Day gift.

Since we are downsizing, and there are MANY things we are not taking to the new house in Utah, I decided to create a gift for my mom using only what I had on hand.

I realized the best gift would be to repurpose some of my succulents into a beautiful little garden which meant I would be "gifting" them to her along with items that I already had.

Many of these succulents were grown from babies and grafts that I tended to myself.

So I rolled up my sleeves and got to work.


After the long winter months, many of my succulents had reached for the sun and were quite leggy and spindly.

Succulents will do this IF they need to and while they are perfectly healthy, they do look a bit ragged and will NEVER go back.
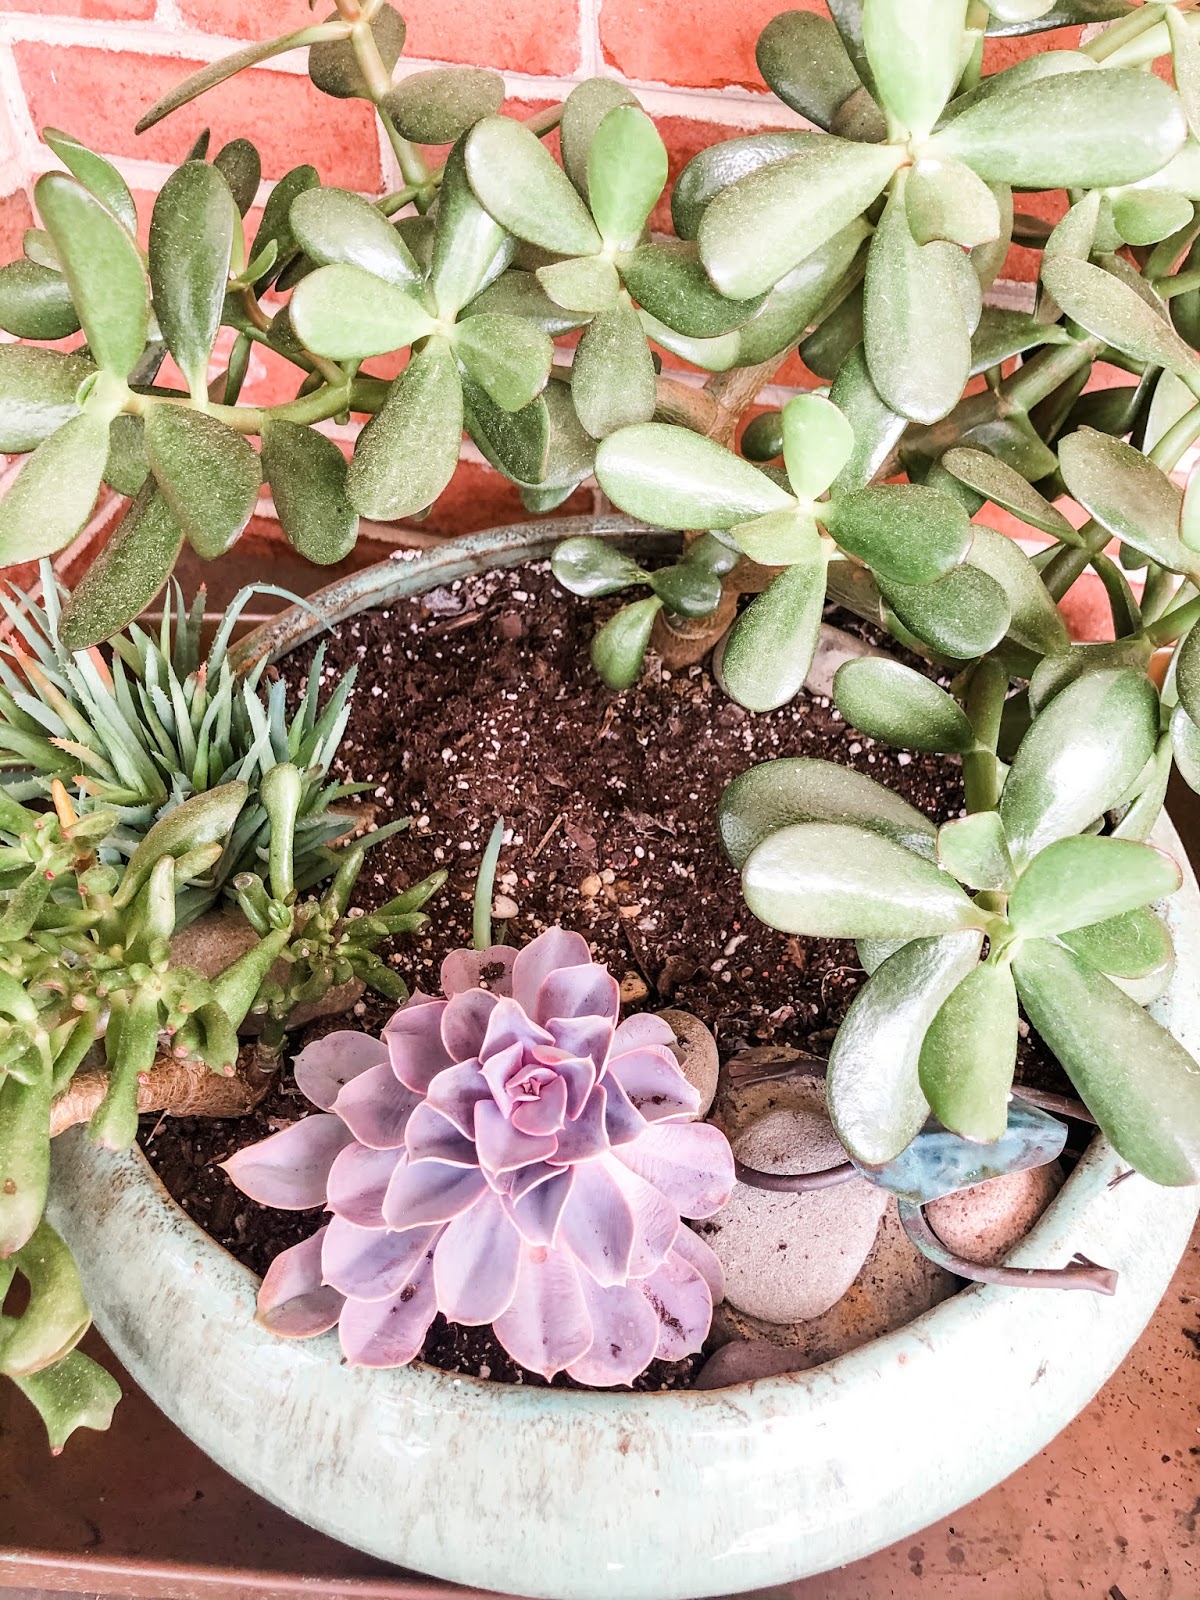

But all is not lost when they do this.

With so careful pruning and understanding of how succulents cultivate, anyone can have a green thumb.


The first thing to do I snip off the growth.

You can use each one of these leaves to cultivate new roots and grow a new plant (which I did last year) but the easiest thing to do it reuse just the top part that resembles a flower.
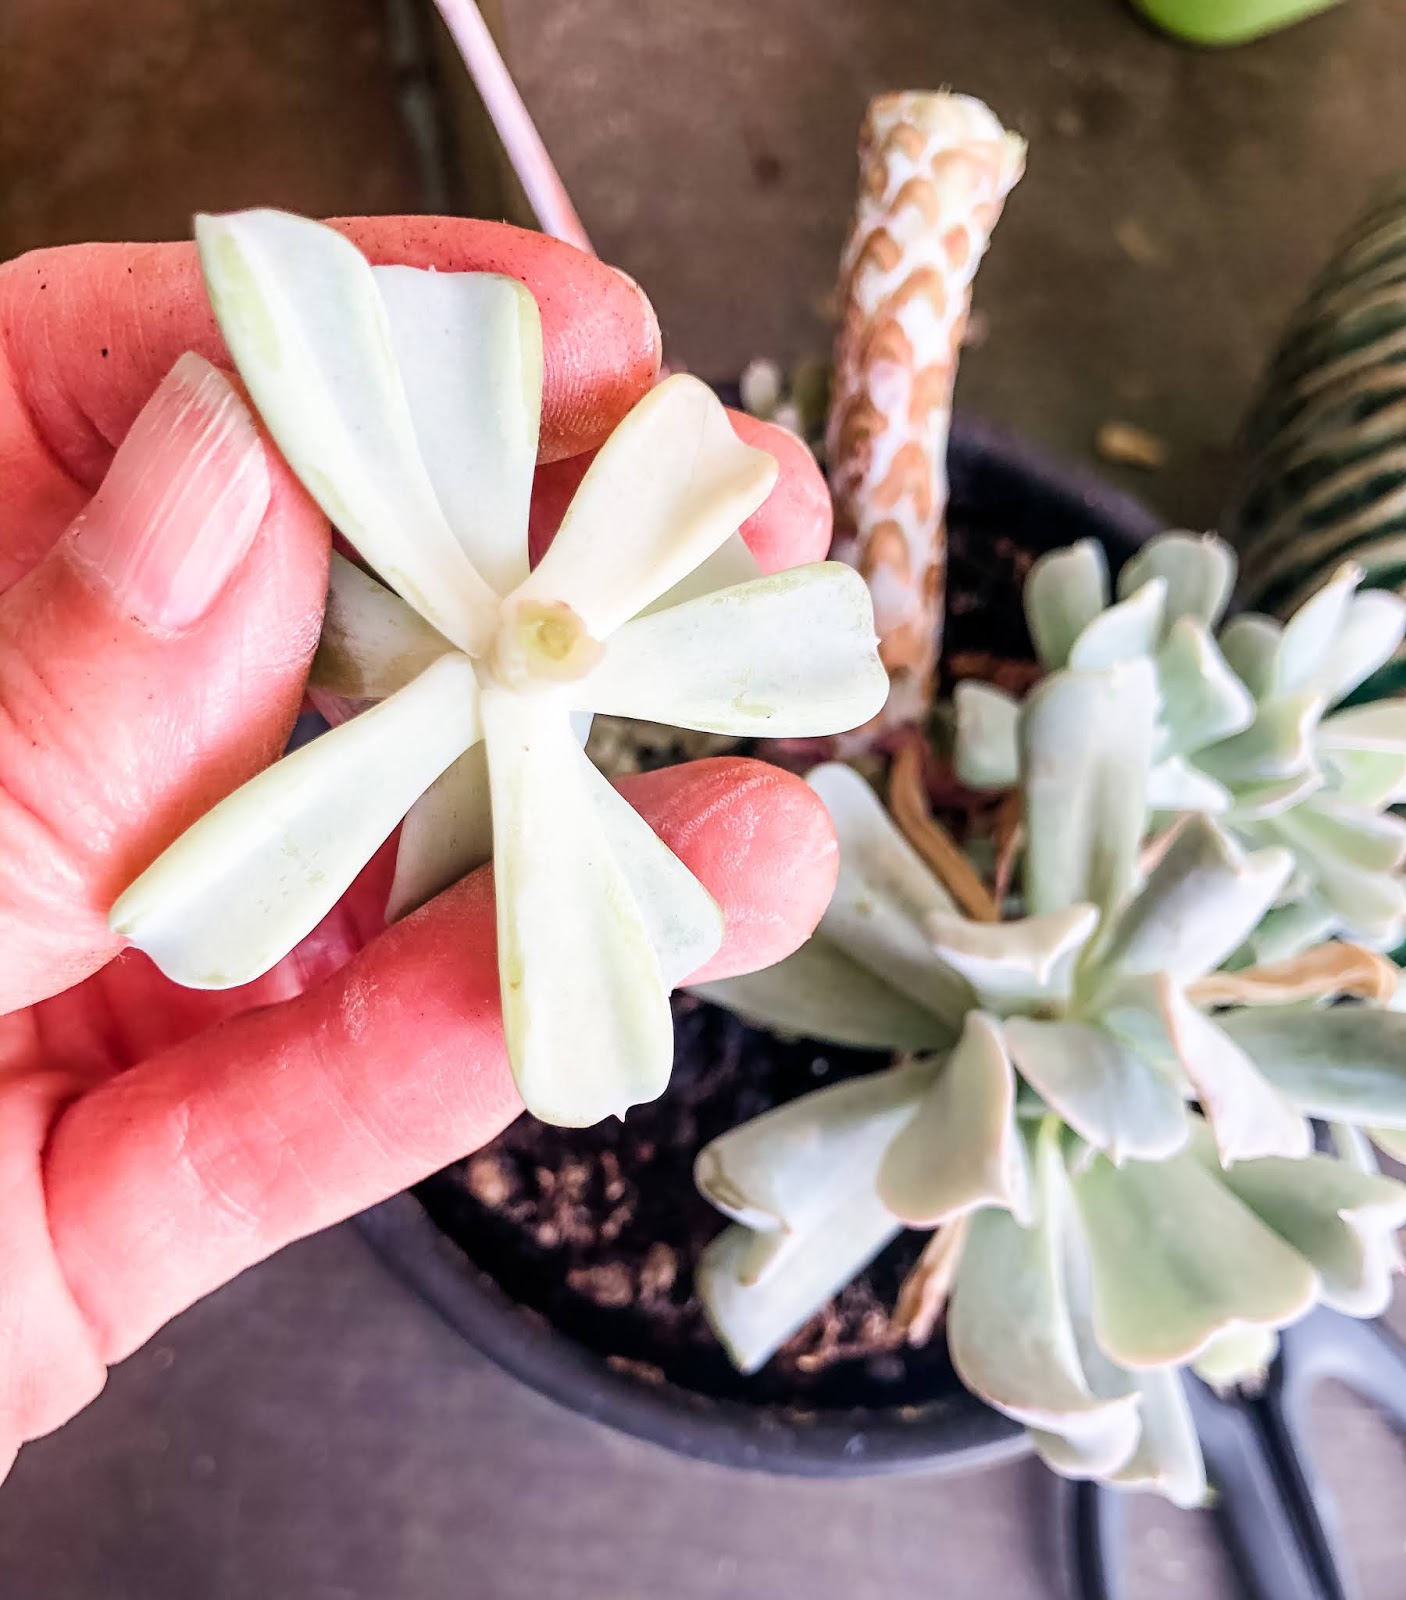

Here, I removed the bulk of the stem, taking it down to just about 4-5 mm below the bottom row of leaves.

You can also pluck the leaves off here so the succulent doesn't have to expend too much energy towards the leaves and not enough to root growth.


From the side, you can see the length of the stem.

I love that the top still looks pretty and shows no sign of damage.


I never forget to snip a few of the babies that are growing as well.


These dime-sized plants look great nestled in and among rocks as you will soon see.


I took apart 4 different planters of succulents to cultivate this many plants.

I took the yellow McCoy vase and added some additional succulents which will get added to the whole arrangement.


Last year, I had this pedestal planter that needed a good spray of black spray paint for this year, but otherwise was perfect for the low mini garden idea I had.


I also had just enough Succulent potting soil to raise the soil level in the container to the appropriate height.

(I love it when the stars align and it all works out!)


I placed the yellow planter first, leaving room behind it to plant as well.

It will be seen from all sides.


I then added my larger plants.

This allowed me to see how much space is left for the smaller plants.


I used the planter to create a "swirl-like" theme of tall to shorter in the front.

It gives the planter a sense of movement and style.


I went along and added some high to low touches behind the yellow planter as well.


As things grow, mom will be able to prune and start additional planters if she likes.


In the front, I took some pebbles and started a "pathway" on stones towards the yellow planter.

It's a great way to get texture through "hard-scaping" that's commonly used in landscaping projects.


It also allowed me to build up areas of soil among the rocks where I could place my baby succulents.

When watering, using the rocks to disperse the water among those babies allows them to stay in place until they root well into the soil.


Plus, the tan rocks against the blue of the succulents is so pretty.


I made sure to look around and through different aspects of the planter to see if there were any spaces that appeared bare of needed a zhuzh.

I was happy because I had this...


The perfect Mother's Day planter using great stuff I already had on hand!

I recycled and upcycled to give everything a new life!

It's a Win*Win!


Tuesday, December 24, 2019

Last Minute Quick Gift: Spiced Pecans

 I'm not much of a baker.  

I leave that to the hubster.

However, a friend and her husband came over and while the guys watched the Army/Navy game (and destroyed the charcuterie I built), we made her recipe of Spiced Pecans.

It was SO EASY, and so much fun, that the next day hubby and I made 4 more batches.

You can do this any time of the year, but I've been giving it as gifts this year, and it's a quick option for some last-minute gifting.

Let me show you.

You will need the following to make one batch:


4 Cups of Pecans, 1/2 Cups of Sugar.


1 Egg WHITE, 1/4 teaspoon of salt, 2 teaspoons of Cinnamon, 1 teaspoon of nutmeg, and 1/4 teaspoon of Ginger.

Preheat your oven to 300 degrees.


A large bowl for mixing, a medium bowl for mixing, and a cookie sheet.

Start by dropping your 1 EGG WHITE into the large bowl.


Add your 4 Cups of Pecans and stir until the pecans are thoroughly coated with the egg white.


In your medium bowl, combine all the dry ingredients: sugar, salt, cinnamon, nutmeg, and ginger.

Give it a good stir so they are all well distributed.


Dump this over your egg white coated pecans and stir.


You want to totally coat the wet pecans with the sugary/spicy mixture.

Spread them fully out on a cookie sheet.
(This cookie sheet was used multiple time so there's residue, that's fine, just keep on!)


Bake at 300 degrees in the middle of the oven for 20 minutes.

I sware, it takes longer to bake than it does to prep all the ingredients!

Once it's done, take it out and let them cool for a bit on the cookie sheet - about 15 minutes.

Once cooled, break up any chunks of pecans into "grab-size" pieces.

You can store in a large bowl until you are ready to bag, box, or eat them yourself.


Hubs and I ended up making a dozen 2 cup bags.

We gifted our neighbors, mail carrier, friends, and family with them.

And, I must say, it was fun making them together...a tradition we're going to continue next year!


I hope you have a joyous Christmas.

I'm going to take a break from posting new content until Saturday the 4th of January.

I've got an exciting "series" planned for the new year, one that I hope will inspire you.

I love all my rule breakers!


Tuesday, December 17, 2019

Oh Christmas Tree

Soooo...

Funny Story to tell.

I had planned to NOT put up a big tree this year.  I just wasn't feeling it.

Instead, I was going to put up the small tinsel tree that showcases the Shiny Bright ornaments that once belonged to my sister-in-law.


It's a small sweet silvery tree with white lights.


The colorful ornaments made popular in the 50's look beautiful against the silver.


I have just enough of them to fill this tree all the way around.


I love how "retro" it feels at night with the lights on.  

It really adds a great touch to the large foyer in our home.

BUT!

In true "Mikki" fashion, while pulling out the color-coordinated boxes of Christmas decor from the basement, I remembered that LAST YEAR, I had purchased a new 6-foot tree for the living room.

Ummm...  What?

"UHHHH...honey!  I think we need to do a tree in the living room because I got a great after Christmas deal on it and I can't leave it in the box!"

So, I cut the tape and took out the new 6-foot FLOCKED TREE!

Yep...what the FLOCK was I thinking?

Oh...and with it was 6 boxes of new crystal cut LED white lights.

Imagine if you will the sheer amount of white powder that coated our floors and tables once the tree was up AND the lights were carefully wound around and through the branches.

I'm not sure hubby will ever recover from the laughter.

However, in the end, it was beautiful and we are truly enjoying the tree this year.


My theme, as in year's past, is a focus on woodland creatures and warm fall colors.

There's not a traditional bone in my body when it comes to this tree.


I love stuffing my ski fox (my sweet spirit animal) among the branches.

 Big items like this add focal points to a tree and give it texture and interest.


This little squirrel, with his "furry" body, peeks through the branches.

Here's a great shot of those crystal cut LED lights I mentioned earlier.


I love the soft orange balls, the coppery globes, and the different ornaments of brass and gold.


Of course, there is A LOT of glitter and glittery elements.

My giant brown velvet and gold-trimmed bow tops the tree just below the gold star.


I like to tuck little items into the tree.

This porcelain bird in her nest can be seen if you look closely. 


The frosted deer are from Dollar Tree last year at the end of the season.

You can see how more of the flock has settled on the ornaments.  I think it gives it a sweet touch...like the tree is decorated outside in the gently falling snow.


I've used a few beautifully wrapped boxes among the branches as well.

Like the ski fox, these add a large focus for the eye.


There are even some artfully disguised gift card "books" scattered throughout as well. 


I've had these jingle bells for a long time.  They just lay across a few branches and reflect the ornaments around them.


A few years ago I wired large glittered feathers, some real feathers, and some brown glittered berry picks together.

I stuff these in all over the tree along with some gold "curly cues."


My little Snow Baby, one of my older ornaments, always can be found "hanging around" the tree.


Of course, you will find several different foxes making appearances here and there as well.


And not be outdone...there is quite a collection of owls there too.


By day, the tree reflects the sunlight that comes through the window.

Yes, I stuff this tree within an inch of its life.

But, I love the look of an "overstuffed" tree so it works for me.


I believe that I like this flocked tree better than the tree I used last year.

The flocking, although challenging, really shows off the ornaments and the colors that I put on our tree.

AND.....


At night, it just glows!

The flocking takes on a bright white look and the colors in the woodland theme stand out even more.


My life-sized baby fox stands guard underneath on my satin gold tree skirt.

The partridges and pears are the perfect foundation for this tree.

I found the cutest woodland-themed paper, with foxes on it, at the Dollar Tree this year.

It's going to look great on the presents under this tree.

I guess I "broke" the rules because of the non-traditional color choices of the tree.

It's just who I am!

Merry Christmas!


© No Rules after 50. Made with love by The Dutch Lady Designs.