gardening

Saturday, July 4, 2020

Summer Yard Revisit

In 12 days we are moving to our new home in Utah.

Yes, I am a bit crazy as I pack up 21 years of living, making the needed decisions of what moves, what stays and is donated, what's gifted, and what's heading to the trash.

I've been so busy that I have decided to "revisit" some of my posts from a year ago because let's face it...

I have not had time to really craft a great post for you all to read.

So, please be patient with me as I pack and pick which posts to recycle.

I am sure you will enjoy this one!


Check out last year's yard HERE.

Believe me, it doesn't look quite this good this year because we are selling and can't maintain all those flower pots!

Grab a cold drink, sit back, and enjoy!

I'll see you next week.


Tuesday, May 19, 2020

Simple Plant Care Project

I love plants and flowers in my home, but I don't want to invest a lot in constant care and attention.

I currently have a few easy plants that only require a once a week watering, but like furniture, plants need to be dusted which can be quite the task when you look at the number of leaves.

I did a bit of research and found the perfect solution.

An easy to make recipe that anyone can create and use.

You will need a glass bottle with a spray nozzle.


I had these already, but you can easily find them at Amazon.

I used a 16 oz size in the Amber glass, but there are many varieties of colored and clear glass to choose from.

In each bottle (I gifted one to my mom as well for Mother's Day), I put a capful of Thieves Cleaner, 20 drops of Citrus Fresh essential oil, and topped the rest of the bottle with tap water.


But I wasn't content to leave the bottles unadorned.


I turned on my Cricut and designed a cute vinyl label for the front.

If you don't have a Cricut, you can simply make your own paper label and attach it with clear packing tape.


This concoction needs to be shaken prior to each use.

So, I pulled out by Brother label maker and created those short directions.


I looked through my sticker stash and found some cute palm leaf stickers.


I used one to accompany the directions of the back of each bottle.


I grabbed my first dirty plant and placed it in my kitchen sink.

You could also do this outside.


You can see how dusty (we recently had some drywall repaired and sanded) the leaves were.

Plants require clean leaves in order to process through photosynthesis.

Outside, the rain takes care of that, but inside is another story. 


I simply sprayed to leaf clusters, starting a the top and working my way down.

As the top leaves drip down, they create a nice waterfall effect, cleaning the leaves below them as well.


I left the plant to drip dry in the sink for about an hour and then traded it out for another one.

It worked like a charm and now all my house plants are clean and happy.


This is one cleaning job I will gladly do because it takes me very little time and effort for such a great return.

Now, go ahead and make your own Plant Care Spray!


Saturday, May 16, 2020

No Cost Gift Giving

This past Mother's Day was quite different than any in the past.

A lot is going on in my personal world (downsizing, prepping to move, selling our home) and in the outside world...hello Pandemic.

We've been adhering to expected behaviors by limiting our time in stores (groceries and carry out specifically) and I have not been shopping for other items no necessary to daily life.

This included shopping for a Mother's Day gift.

Since we are downsizing, and there are MANY things we are not taking to the new house in Utah, I decided to create a gift for my mom using only what I had on hand.

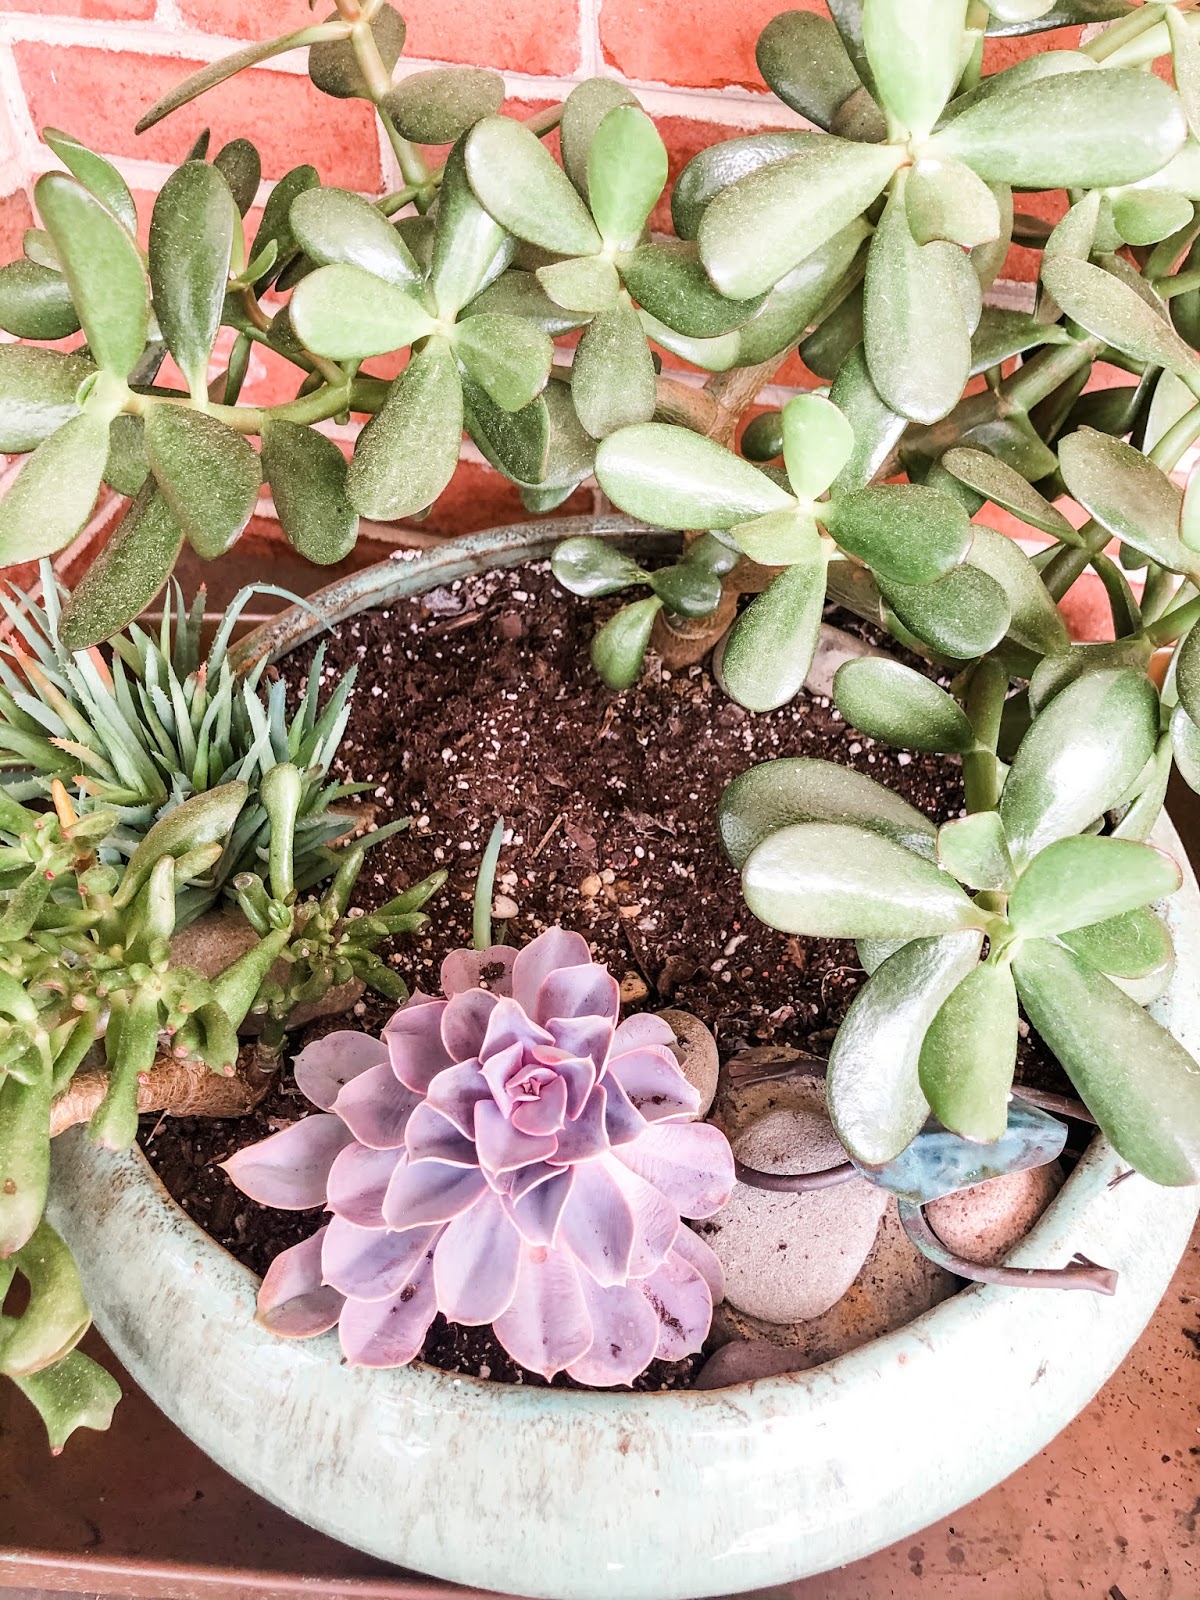
I realized the best gift would be to repurpose some of my succulents into a beautiful little garden which meant I would be "gifting" them to her along with items that I already had.

Many of these succulents were grown from babies and grafts that I tended to myself.

So I rolled up my sleeves and got to work.


After the long winter months, many of my succulents had reached for the sun and were quite leggy and spindly.

Succulents will do this IF they need to and while they are perfectly healthy, they do look a bit ragged and will NEVER go back.


But all is not lost when they do this.

With so careful pruning and understanding of how succulents cultivate, anyone can have a green thumb.


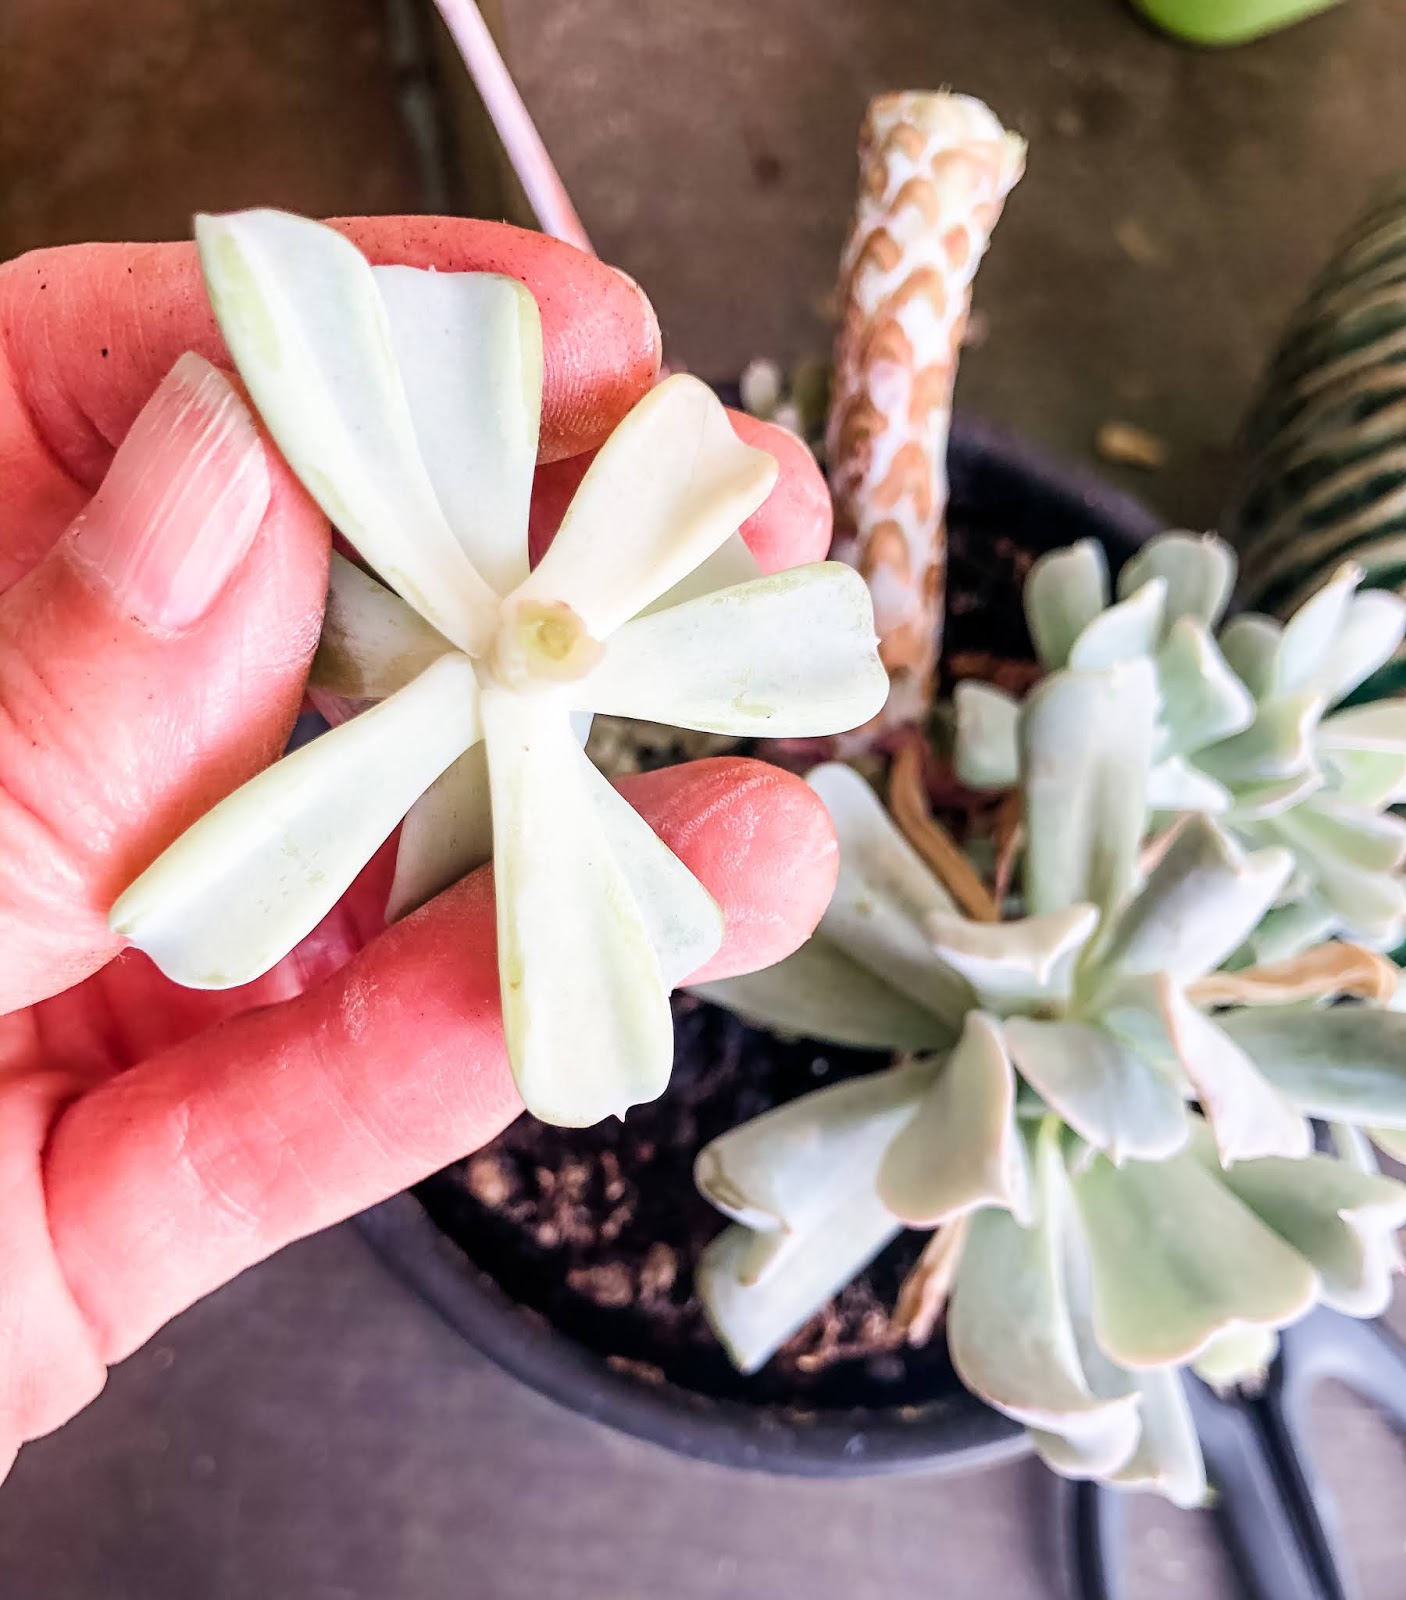
The first thing to do I snip off the growth.

You can use each one of these leaves to cultivate new roots and grow a new plant (which I did last year) but the easiest thing to do it reuse just the top part that resembles a flower.


Here, I removed the bulk of the stem, taking it down to just about 4-5 mm below the bottom row of leaves.

You can also pluck the leaves off here so the succulent doesn't have to expend too much energy towards the leaves and not enough to root growth.


From the side, you can see the length of the stem.

I love that the top still looks pretty and shows no sign of damage.


I never forget to snip a few of the babies that are growing as well.


These dime-sized plants look great nestled in and among rocks as you will soon see.


I took apart 4 different planters of succulents to cultivate this many plants.

I took the yellow McCoy vase and added some additional succulents which will get added to the whole arrangement.


Last year, I had this pedestal planter that needed a good spray of black spray paint for this year, but otherwise was perfect for the low mini garden idea I had.


I also had just enough Succulent potting soil to raise the soil level in the container to the appropriate height.

(I love it when the stars align and it all works out!)


I placed the yellow planter first, leaving room behind it to plant as well.

It will be seen from all sides.


I then added my larger plants.

This allowed me to see how much space is left for the smaller plants.


I used the planter to create a "swirl-like" theme of tall to shorter in the front.

It gives the planter a sense of movement and style.


I went along and added some high to low touches behind the yellow planter as well.


As things grow, mom will be able to prune and start additional planters if she likes.


In the front, I took some pebbles and started a "pathway" on stones towards the yellow planter.

It's a great way to get texture through "hard-scaping" that's commonly used in landscaping projects.


It also allowed me to build up areas of soil among the rocks where I could place my baby succulents.

When watering, using the rocks to disperse the water among those babies allows them to stay in place until they root well into the soil.


Plus, the tan rocks against the blue of the succulents is so pretty.


I made sure to look around and through different aspects of the planter to see if there were any spaces that appeared bare of needed a zhuzh.

I was happy because I had this...


The perfect Mother's Day planter using great stuff I already had on hand!

I recycled and upcycled to give everything a new life!

It's a Win*Win!


Tuesday, July 9, 2019

Backyard Summer Tour

One of my favorite things about the spring and summer months is enjoying our backyard space.

We have a rather large backyard, and when we purchased this house from my hubby's parents, it was mainly a large stretch of grass, large, large, large bushes (read overgrown), a concrete patio, and many azalea bushes.

However, it also had water front footage and the POTENTIAL for a really beautiful space.

Of course, 20 years later, we've gotten it to the point of saying we're done.  We've made all the improvements we're going to make.

Is the yard truly done?

Probably not, but we're going to let the next owners (whenever that may be) decide how they want to add and subtract to the yard.

For us... we're done.

So, sit back, and let's take a stroll around our backyard spaces.  


View from our dock, out over the water.


We have a "turtle deck" that my hubby placed in the water to accomodate the numerous turtles that like to sun themselves.  Sometimes there are dozens on that deck!


This is the view, looking up towards our home from the dock.  You can see that the backyard is quite large in all directions.


On the left side of the yard is a large bed of shade loving plants.  It's evolved over the years as trees have been removed.


A small raised deck is a nice quiet area to relax.


We have a sunken fire-pit area that at one time was a pool.  Not needing nor wanting the maintenance of a pool anymore, we transformed it into this walled area.


To the right of the yard is my favorite spot.  A large cherry tree shades this area and at night it has lights woven throughout it's branches.


It creates this shaded area where I've placed different rest spots like the bench above and this chair.


A sweet path takes you through from the patio to the side gate.


By one of the three deck levels a dogwood tree provides shade as well as houses at least one nest every spring.  A mated pair of Catbirds have currently taken up residence.


I let the branches hang low so that it creates these little nooks and crannies.


I like how it frames this little pagoda.


We took the existing patio and created a DIY outdoor kitchen area.  I had. the countertop given to me, so using concrete blocks covered with wood and treated for the outdoors, we were able to make an area for cooking and serving.


We placed an industrial grade stainless kitchen table as a prep space - it's been out here for at least 10 years.

We also created a sitting area as well.


Here's a great overall view from our lanai.


An old wheelbarrow is where all my herbs grow, perfect for cutting as were cooking either indoors or out.


The deck spaces have evolved over time.


We have three different levels, all accessable with a step or two.


Different areas to gather and eat or talk provide lots of entertaining spaces when we have friends or family over.


A smaller deck provides are area to sun and lounge yourself.


You can also access the left side of the yard, near the fire pit.


The terraced steps lead to the large garden bed and raised deck as well as the fire pit.


Near the fire pit is this water feature.  I like the combination of water, fire, earth, and air.


Up the back steps and your onto our covered lanai area which leads into the house through the back porch.  We also have a huge wall of sliders in our living room area.


Each year, I fill planters with a profusion of flowers and plants.


I stick to earth toned colors so that it coordinates with the soft surfaces of my house...

Plus, I just gravitate to those colors anyway.


I'm careful to select and combine plants that will work in the area when they will reside.

Shade or sun...


Here's a great shot of the plant that I placed on one of the "cookie" projects I did earlier.


I always reuse items from previous seasons, like this sweet momma and babies hedgehog set.


The gnomes and succulent planter made it's way to our coffee table.


I created this outdoor light by simply spray painting a clay pot, turning it over and inserting a solar stake through the hole.


My weathered asian statue and succulent elephant planted also resides of one of the "cookies" I made as well.


You're always welcomed to stop by my garden and enjoy the seclusion and solitude to be found there.

It's a place where there are no rules, so there's none to be broken.


© No Rules after 50. Made with love by The Dutch Lady Designs.