Saturday, May 16, 2020

No Cost Gift Giving

This past Mother's Day was quite different than any in the past.

A lot is going on in my personal world (downsizing, prepping to move, selling our home) and in the outside world...hello Pandemic.

We've been adhering to expected behaviors by limiting our time in stores (groceries and carry out specifically) and I have not been shopping for other items no necessary to daily life.

This included shopping for a Mother's Day gift.

Since we are downsizing, and there are MANY things we are not taking to the new house in Utah, I decided to create a gift for my mom using only what I had on hand.

I realized the best gift would be to repurpose some of my succulents into a beautiful little garden which meant I would be "gifting" them to her along with items that I already had.

Many of these succulents were grown from babies and grafts that I tended to myself.

So I rolled up my sleeves and got to work.


After the long winter months, many of my succulents had reached for the sun and were quite leggy and spindly.

Succulents will do this IF they need to and while they are perfectly healthy, they do look a bit ragged and will NEVER go back.


But all is not lost when they do this.

With so careful pruning and understanding of how succulents cultivate, anyone can have a green thumb.


The first thing to do I snip off the growth.

You can use each one of these leaves to cultivate new roots and grow a new plant (which I did last year) but the easiest thing to do it reuse just the top part that resembles a flower.


Here, I removed the bulk of the stem, taking it down to just about 4-5 mm below the bottom row of leaves.

You can also pluck the leaves off here so the succulent doesn't have to expend too much energy towards the leaves and not enough to root growth.


From the side, you can see the length of the stem.

I love that the top still looks pretty and shows no sign of damage.


I never forget to snip a few of the babies that are growing as well.


These dime-sized plants look great nestled in and among rocks as you will soon see.


I took apart 4 different planters of succulents to cultivate this many plants.

I took the yellow McCoy vase and added some additional succulents which will get added to the whole arrangement.


Last year, I had this pedestal planter that needed a good spray of black spray paint for this year, but otherwise was perfect for the low mini garden idea I had.


I also had just enough Succulent potting soil to raise the soil level in the container to the appropriate height.

(I love it when the stars align and it all works out!)


I placed the yellow planter first, leaving room behind it to plant as well.

It will be seen from all sides.


I then added my larger plants.

This allowed me to see how much space is left for the smaller plants.


I used the planter to create a "swirl-like" theme of tall to shorter in the front.

It gives the planter a sense of movement and style.


I went along and added some high to low touches behind the yellow planter as well.


As things grow, mom will be able to prune and start additional planters if she likes.


In the front, I took some pebbles and started a "pathway" on stones towards the yellow planter.

It's a great way to get texture through "hard-scaping" that's commonly used in landscaping projects.


It also allowed me to build up areas of soil among the rocks where I could place my baby succulents.

When watering, using the rocks to disperse the water among those babies allows them to stay in place until they root well into the soil.


Plus, the tan rocks against the blue of the succulents is so pretty.


I made sure to look around and through different aspects of the planter to see if there were any spaces that appeared bare of needed a zhuzh.

I was happy because I had this...


The perfect Mother's Day planter using great stuff I already had on hand!

I recycled and upcycled to give everything a new life!

It's a Win*Win!


Saturday, May 11, 2019

Succulent Gnome Garden

Last year, while perusing Big Lots for garden and outdoor decor, I found a sweet set of Gnomes with an Airstream trailer and some camping paraphernalia.  I scooped it up and made a garden in a large round container.

I kept indoors over the winter, trying to save as many of the succulents as possible.  I was successful with about 1/3 of the plants once Spring rolled around again.

So, it was time to regroup, replant, and once again set my little Gnome couple back into the camping mode.

Here's what it looked like after the winter was over.


Not too shabby considering that succulents like a dry hot setting.

The Jade (right) and Ogre Ears (left) flourished pretty well.

The Echeveria (front)...not so much.  These flower-like succulents really need sunlight.  When they are deprived, they will grow up and become "leggy" as they reach for the sun.  In addition, they will bend.  Once this had occurred, they will never go back to the compact "flower" they once were.

But, you can salvage it if you're willing to put in the time.


If you snap off a few of the hearty leaves, right at the "trunk" of the plant and then lay them in damp (not wet) soil in a few weeks you will have these sweet little babies.

Keep them in the sun as much as possible and ONLY WATER when the soil is dry.  I use a large syringe to direct water below their little leaves.

Once you are ready to plant them, just pull off the large leaf and place them right on top of damp soil. Their roots will grab and take hold.  

Now, back to the garden...


I removed all of the pieces, including dead plants and the Echeveria in the front.


I also made sure to check out the Jade and Ogre Ears for leaves that were spent.  These too get removed.


I scraped my hands through the soil to get larger bits of the debris before I added a topping of clean Cactus Soil.

TIP:  While you can essentially plant succulents in regular soil, it's BEST to plant them in a cactus soil made for these type of plants.  Because succulents thrive best in dry settings, you want your soil to drain quickly once it's been wetted.  The plants like to have very dry feet


Here's what I had with to restart with.


I placed my Gnome couple, the camper, and the campfire where I wanted them to be.


I had taken an early trip to Lakeside Nursery and picked up my first round of succulents.  It's by no means the last trip and I was there for other flowers and quickly grabbed a few to start.

I don't know about you, but these are my favorite type of plants and I just absolutely LOVE THEM!!!


Echeveria varieties are my favorite.  These resemble peonies but are hardier and easier to grow.


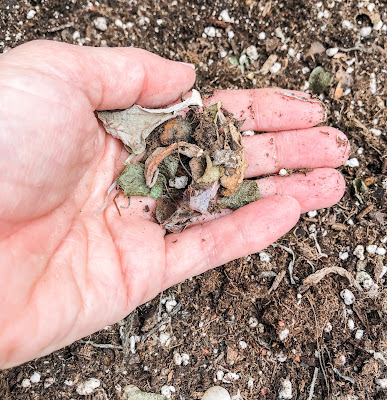
When you take the succulent out of it's growing pot, hold it gently as close to its stem as possible.  Look for dried and dead leaves around the base of the plant.  Gently pull them and they will come right off.  You can also pull leaves that are starting to brown or are starting to look transparent - like they are water-logged.  These leaves will also feel squishy and not firm like healthy leaves.  

You can also pull off the bottom half of the root ball.  Gently shake and work the soil loose.


I planted two varieties in this pot.  Look at the purples and pinks with the soft frosted greens in this one.  It's so beautiful.


The frosty blue-green on this Echeveria is beautiful as well.  You can see the small Jade shoots I replanted from another pot just behind this plant.


A good trick when planting succulents is to add small rocks and stones in areas where there is "free space."  I think it adds an organic touch to all my pots.  It's where they would be in nature anyway.

And here's to pot all done.


My sweet Gnome couple is just swinging away, in front of their campfire, beside their gnome away from gnome.  (Dad joke!)

Notice the layers of rocks and the Echeveria babies next to the camper.


Part of the appeal of using little vignettes with succulents is that you don't have rapid growth that eventually covers over your little creatures and the setting.  If you add traditional plants, you will need to groom and prune them often or they will be lost under the jungle of growth.

But again, there are no rules, so just plant what you want and enjoy it.


I'm calling this pot a success.  The little Gnome couple seems happy with it!

Happy Saturday!


Saturday, July 20, 2019

Faux Succulent Napkin Rings

I love succulents.

I especially love the faux succulents at the Dollar Tree.

I decided to turn them into something I could use every day.


I started with these materials.

4 faux succulents and the Jute Twine from the Dollar Tree along with a paper towel roll.


I measured 1.5 inches from the end of the paper towel roll, making tic marks all the way around the roll.


I used my pencil to connect the marks so that it was "even" all the way around.


Using a craft knife (pkg of 4 from the Dollar Tree), I cut on the line.


I ended up with this ring.

See where I'm going with this yet?


I took a roll of the jute twine and pulled approximately 8-9 yards off the roll.  I used my "fingertip to nose" measurement here.


I wrapped it into a ball around my fingers, small enough to loop through the paper towel ring.


I started lopping the twine, pushing each strand next to the last strand.  


Once I had about 5 strands, I used a small clip to hold the original end.


I continued all the way around the ring until I met the starting point.

A bit of hot glue and the twine was secured.


I pulled one of the faux succulents from the pot it came in and cut off the stem all the way down to the base leaves.  


It's all rubber, so there are no wires to contend with.


I put a large dollop of hot glue at the same point where I met the beginning and end strands of twine.


Then I placed the cut succulent over that dollop and held it in place for a minute or two.


Then I set out to make 3 more exactly like the first one.


I did use clips on each and waited until they were all at the hot glue point.

This way I only had to have the glue gun plugged in for a bit.  I hate when the hot glue seeps out when you're not using it.


And just like that, I had "Pottery Barn" inspired napkin rings.

Cost:  $4 for succulents, $1 for twine, $0 for paper towel holder and rest of supplies.

$5.00!!!


The paper towel holder is the perfect diameter for large "Lapkins."  You know, those fabric napkins that are large enough to cover your lap; much bigger than a paper napkin.


The rings look great holding my real Pottery Barn napkins (14 years old!) and paired with my place-setting.


I should make 4 more for an even 8 set.  I still have plenty of paper towel holder, and could even introduce another style of faux succulent.


I love how rustic they are, but I especially love how affordable they are.

It's a rule breaker, not a bank breaker!


© No Rules after 50. Made with love by The Dutch Lady Designs.