So, as promised, here is part 2 of my Dollar Tree Christmas Tree creations.
When I originally purchased the white trees and that decor, I also purchased a pair of green trees and decor with the intention of creating a tree for my father-in-law. Because they do not live together (medical reasons), I wanted them to each have their own tree - a bit of festive cheer in their individual places.
However, the more I mulled over my decor choices for his tree, I realized that he would appreciate a more "Christmasey" type tree, and not the "Woodland Themed" tree I was thinking about.
So, not to be a Humbug, I went back to the Dollar Tree and purchased decor more in line with the season.
Here's how it all went down...

Upon my return to the Dollar Tree, I decided to go with a snowman slant, focusing on the red and white colors that would really pop on the traditional tree.
In addition, I also picked up a pack of 20 plug in lights (yes...at the Dollar Tree) as well as a package of Wired Garland Ties. These were made by the same manufacturer as the Christmas trees and matched the branches perfectly.
Remember, I had already purchased 2 trees with the idea of cutting up the second one, BUT, now I had 2 themes for 2 trees and needed some way to "fill out" each one.

I knew I could wrap the ties around the stem of both trees and fill it out much like I did the white tree. I could also skip the hot glueing here because it's just a matter of wrap and twist! (Tip - if you buy the white tree you will need two trees to fill it out as there are not white garland ties in the store, only green.)


It was super easy to fill using the wired ties. I started by pulling down the bottom branches of the tree and then twisting a tie around one time. I filled in with 3 ties and distributed the branches in a wheeled pattern all around the trunk. Next, I pulled down the next layer of branches and repeated with 2 ties. To make the branches the same length as the descending branches I simply twisted them once more around the trunk. You can also cut and "prune" as needed.
By doing this wrap and twist effect it effectively covered the trunk of the tree - similar to the branch pieces you get with artificial trees intended to camouflage the wooden trunk.
In the end, here is what I had:

I added the plug in lights starting at the bottom so that the plug was located there. I originally bought 2 packs, but only needed one set of 20 lights.

I started with the largest ornaments - the snowmen, and hot glued them into place.
As with all the glued on ornaments, I snipped off their hanging ties with scissors.
Aren't these the cutest? Their arms are actual twigs and their sweet smiles are super cute! (They would be cute package decor as well...and at $1 a piece, a great way to add an ornament to a package as a bonus gift!)

After that, I glued on the rest of the elements; the red balls were glued so they appeared to "hang" from the branches, the candy canes were glued where they touched the branches, and the snowflakes were glued where they naturally filled in open spaces.
When hot glueing the ornaments on the branches, hold them for a minute so the hot glue cools enough to adhere and they don't fall off. You can use a hair dryer on the cool setting and low speed to accelerate the cooling process here, but I just waited patiently.

The floral picks were pulled apart and each element was randomly glued on the tree to fill it out.
The gold star topper was glued to the tip of the tree (which I bent in half to make stronger).

When it was all done, I had a traditional tree that I am sure my F-I-L will like.

I pulled another cloth napkin for a tree skirt and it added the perfect touch.
All in all, this tree cost a total of $15.00!
One item that I bought but did not use was tree garland.

It would have been too much for the tree, BUT... it will look amazing on packages in place of ribbon or twine. And, with 20 feet, I will get to use it on several wrapped items. (I think I might go back and buy some of the other colors as well!)
Oh, and the Woodland Themed decor...

 |
| These squirrels were found in a pack of 4 at Wal*Mart. I couldn't resist buying them for this tree! |
It was assembled in the same way as the other tree, but you will notice, it has none of the traditional Christmas decor...
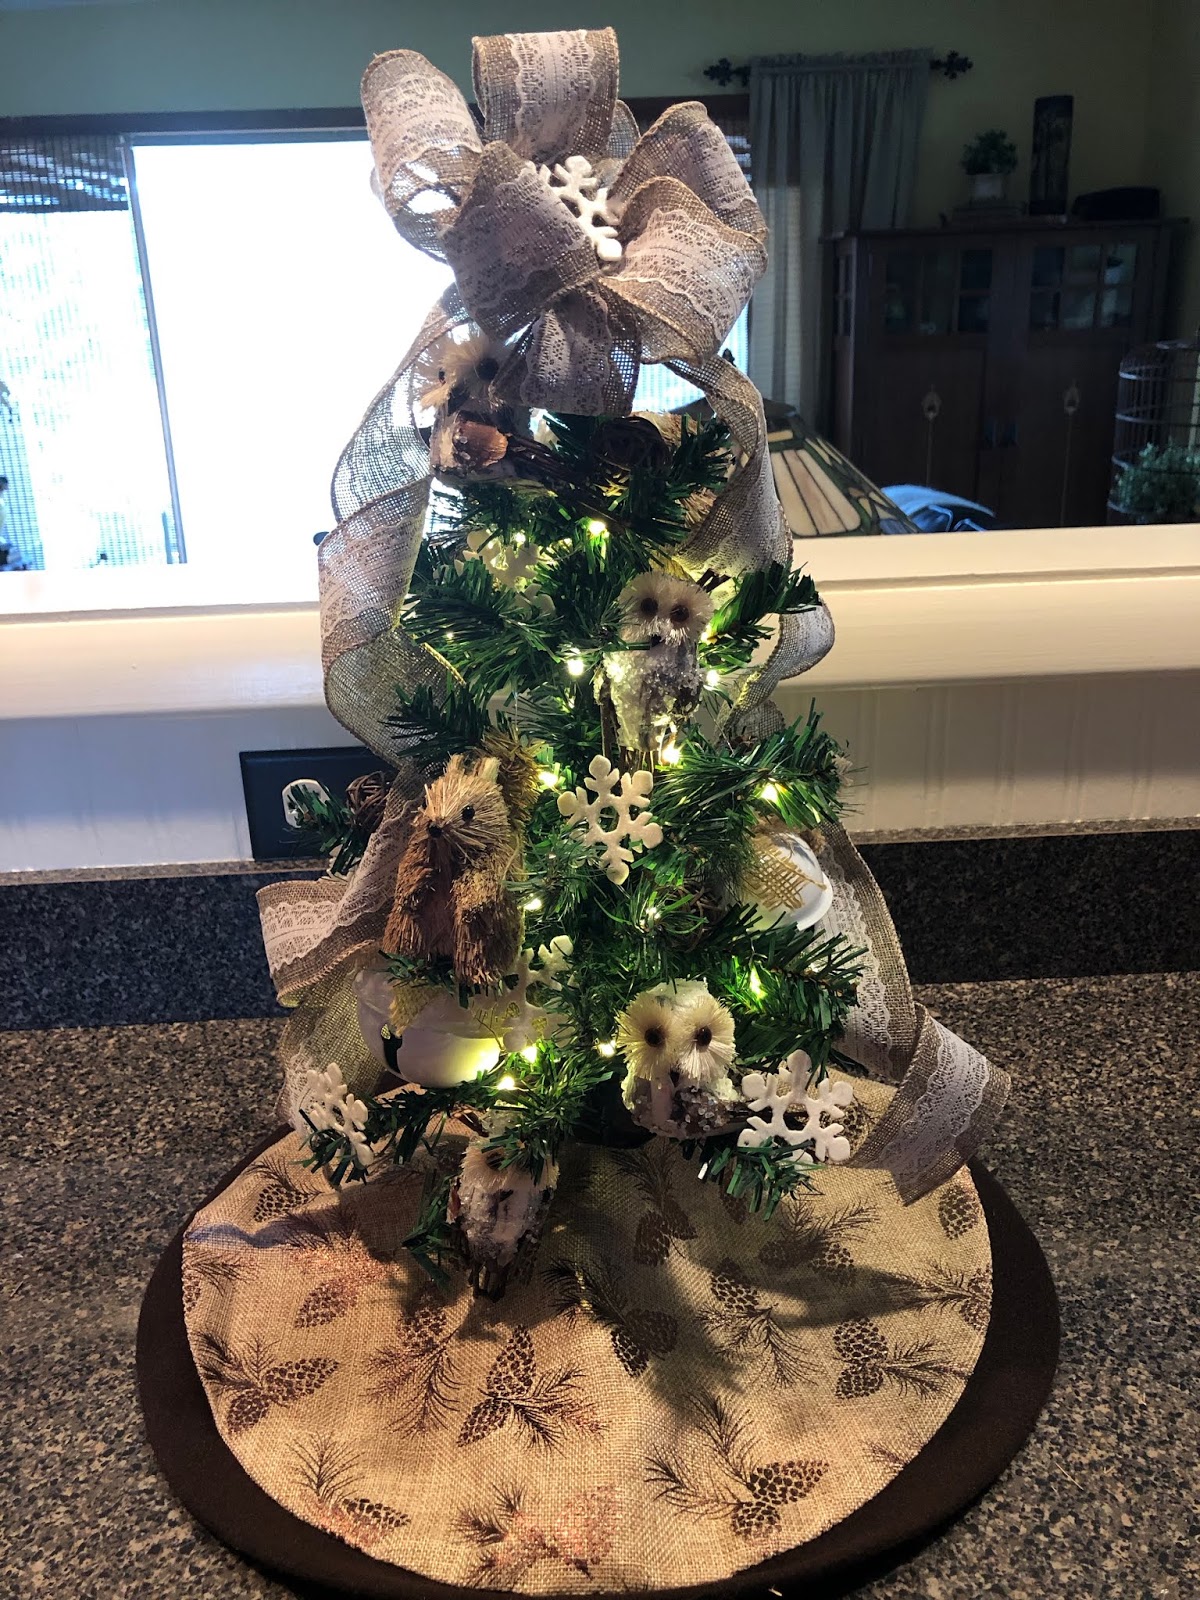
However, I LOVE THIS TREE!
So, I'm keeping it for myself and will use it on a dresser in our entry hall. I also think I will leave it out a bit longer than the holiday season. It has that sweet winter vibe so it can linger well into the winter months.
I didn't use all the decor elements I had initially purchased for each tree, but I will find other ways to incorporate them into my holiday decor and wrapping.
I want to wish everyone a Happy Thanksgiving. I hope you celebrate with those you love and are focused on a beautiful season of giving and receiving.
Stop back by on Saturday as I will have a full report and photos on my Thanksgiving planner and dinner party!


Post a Comment