While I am not a big fan of decorating for Christmas BEFORE Thanksgiving, I wanted to share my Dollar Tree Christmas Tree with you before they are sold out of their holiday decor items.
If you haven't discovered The Dollar Tree yet, a word of warning... you will be hooked from the get-go. I am a Dollar Tree FANatic, and I love the quality, variety, and of course the cost of all things "Dollar Tree."
Let's get started...
My sweet mother-in-law is 96 years old and is in a medical wing of a senior living establishment. She is separated from my 101 year old father in law due to medical needs, so this year, I decided to create 2 small trees, one for her and one for him (Part 2 on Tuesday), so that they could enjoy them when "visiting" each other on a daily basis.
The Dollar Tree has both white and green 18" trees, hundreds of nice quality ornaments in different textures, colors, themes, and sizes, small lights that are both battery operated or plug in, tinsels, floral picks, ribbons,...really anything and everything you will need to create a beautiful tree, full sized or not.
I love a white tree because traditional Christmas colors really pop when paired with them. I went with a red theme, using fairy lights that I already had as well as a checkered cloth napkin for a "tree skirt."
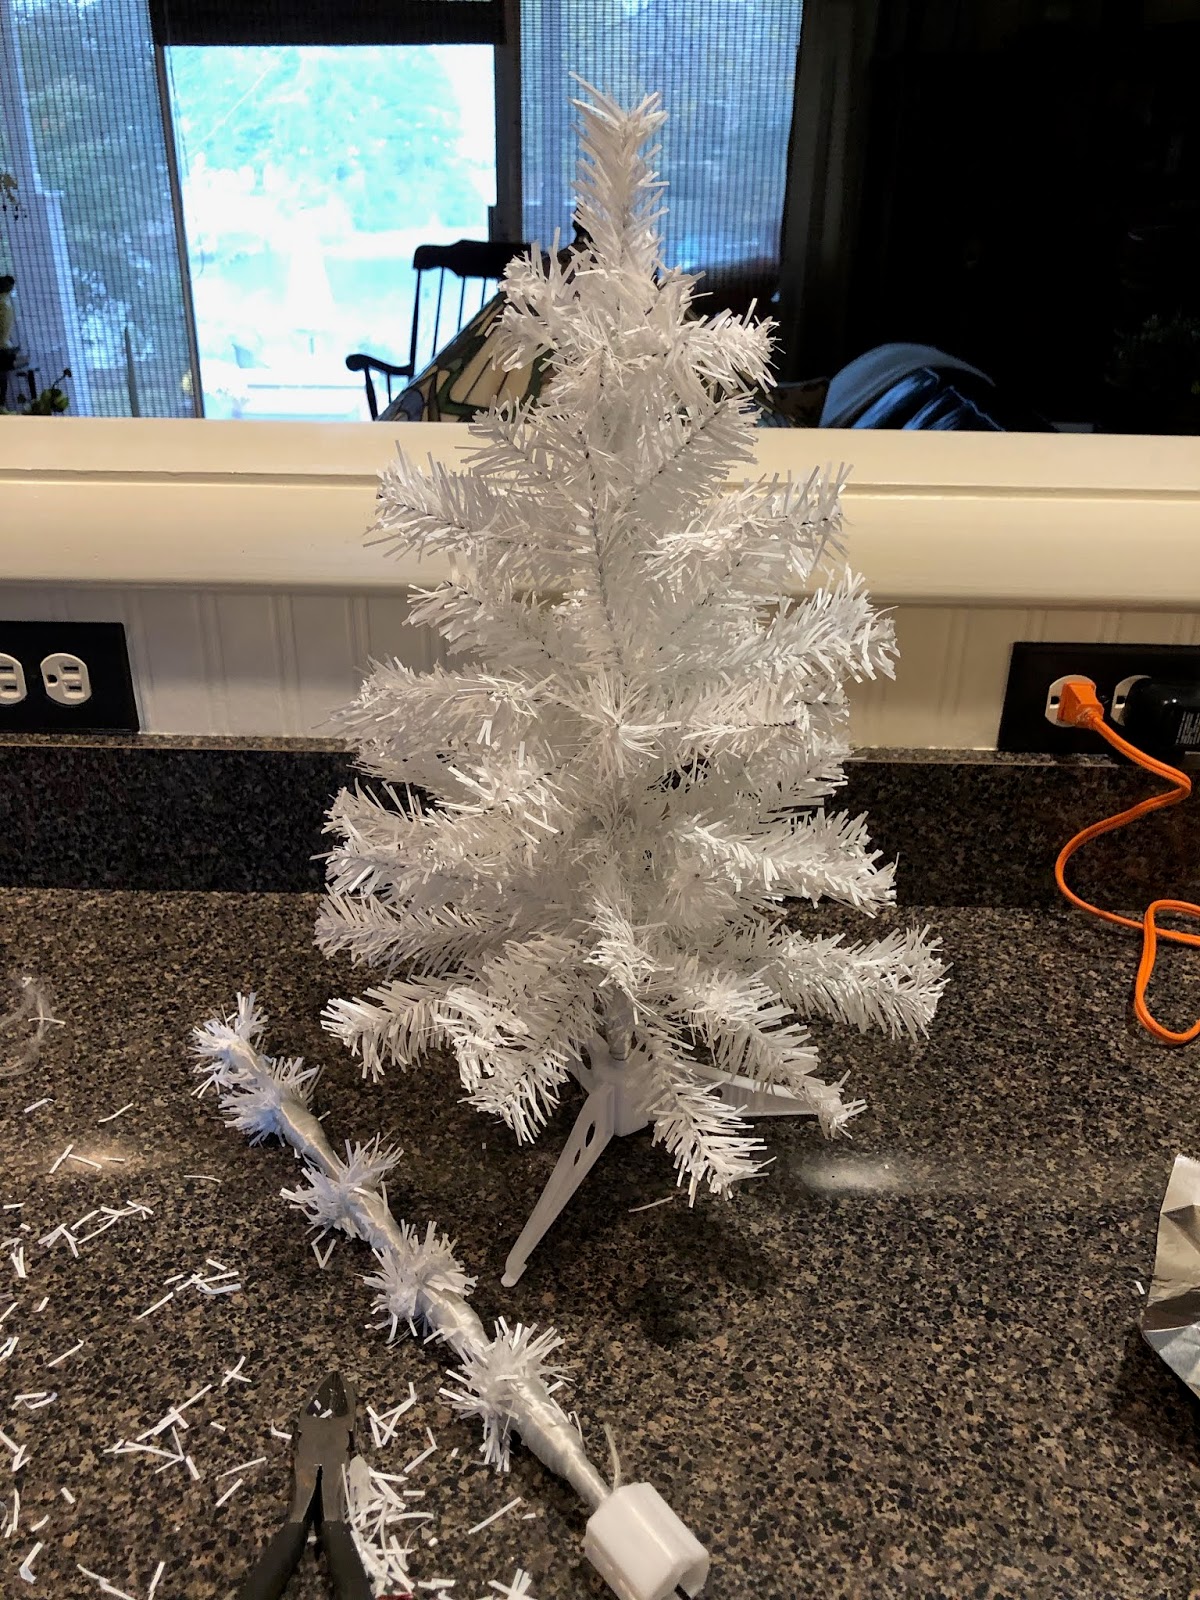
I purchased 2 trees.

You can see that these trees are not full and lush, but more of a sparser tree style. I wanted a fuller tree, so I used snips to cut off the limbs on tree number 2.

Then, using my hot glue gun (this one is 24 years old...I'm not kidding!), I hot glued the branches to the "trunk" of the tree.

If you just hold it a bit, it will adhere and not droop down.
When I added all the branches from tree 2, this is what I had:
Doesn't it look great? Super full, and you can't even tell where I glued the new branches. You can also use the snips to trim the finished tree into its traditional conical shape, but I just used matched up the branch lengths as I ascended the tree.

Next, I added the fairy lights and it was ready for the ornaments.
I love having a few spare strings of these types of lights. They are great for placing the jars, along table decor, and of course for stringing through and around items. You can usually find them for a few bucks at discount home decor stores and Amazon. Stock up...they are a decor staple!
I began adding these beautiful Cardinal floral picks. They have a clip on the bottom for attaching to the branches, but I pulled that off and hot glued them to the tree in a zig, zag pattern.

I like to place my largest ornaments first, and then fill in with my smallest items last. These picks look great as a whole, but I did pull apart the last two and used the elements separately on the tree.

Here is what it looked like with the picks; both in tact and pulled apart and added separately.
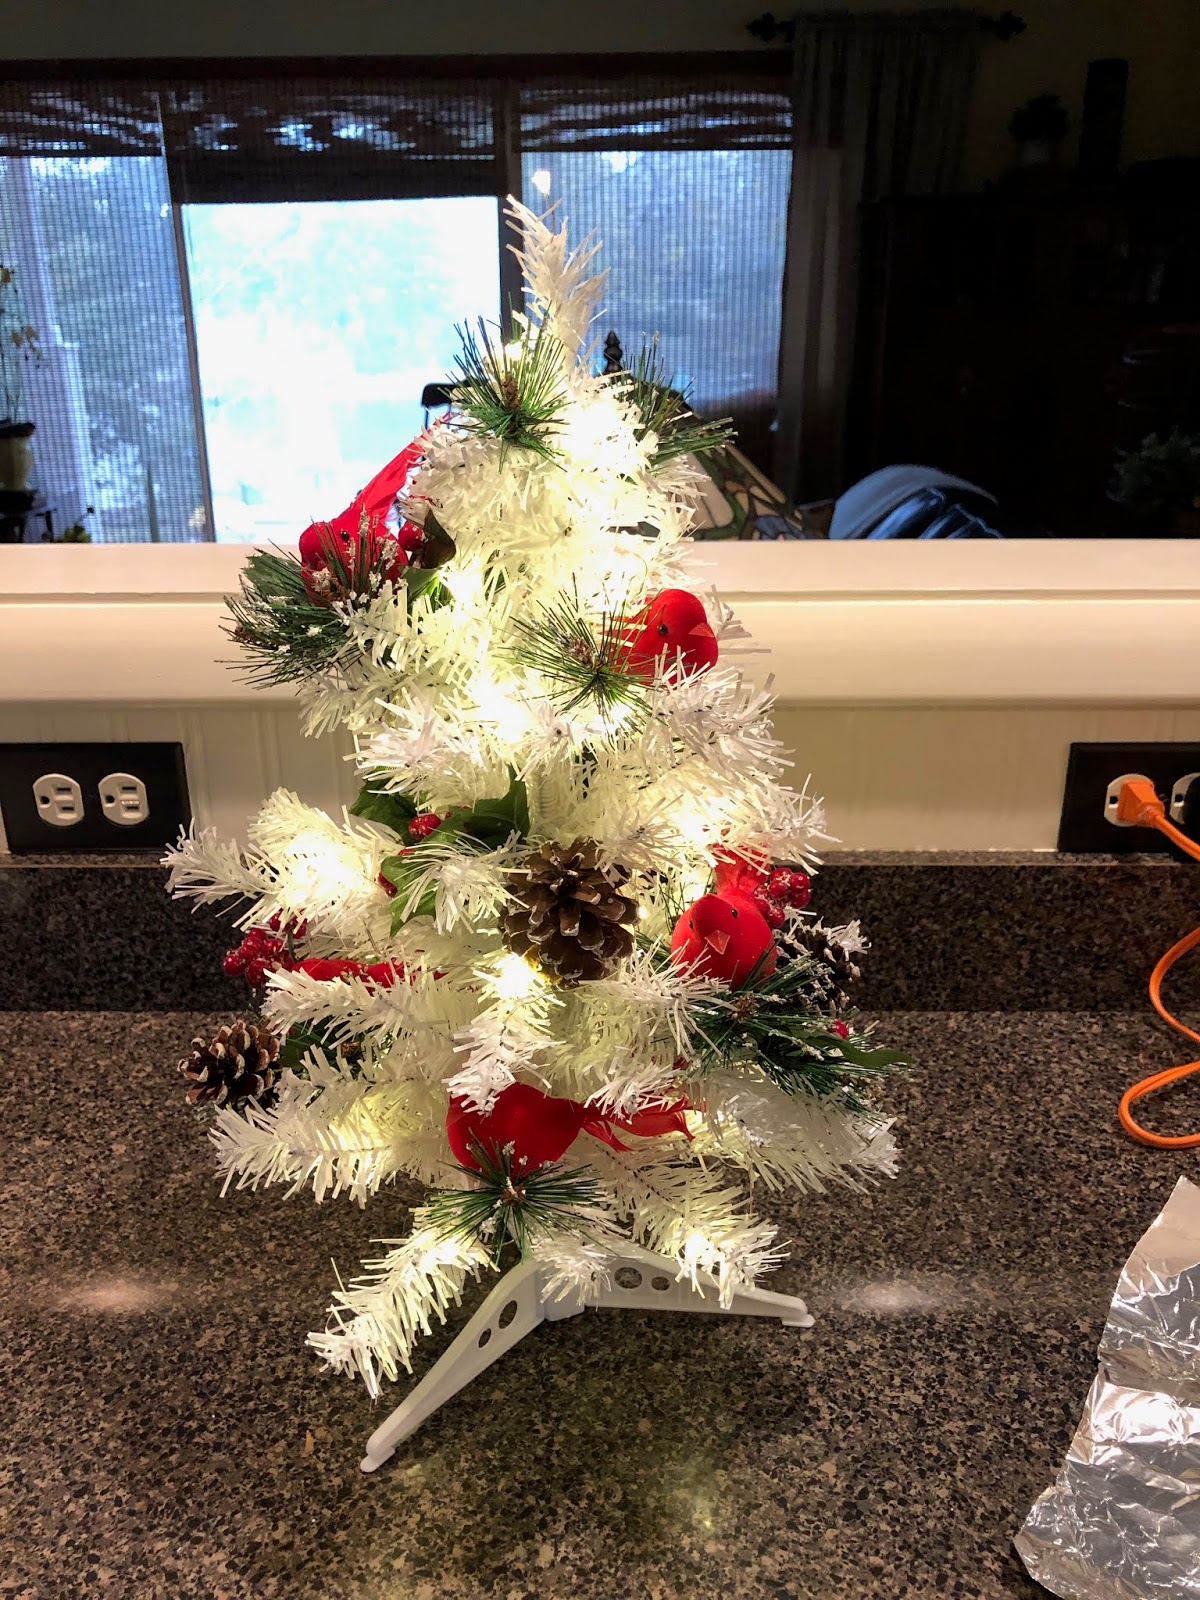
Next, I added small red balls and white glittered snowflakes. The red balls came in a long tube and the snowflakes came in a package of 6. These too were glued on the tree.


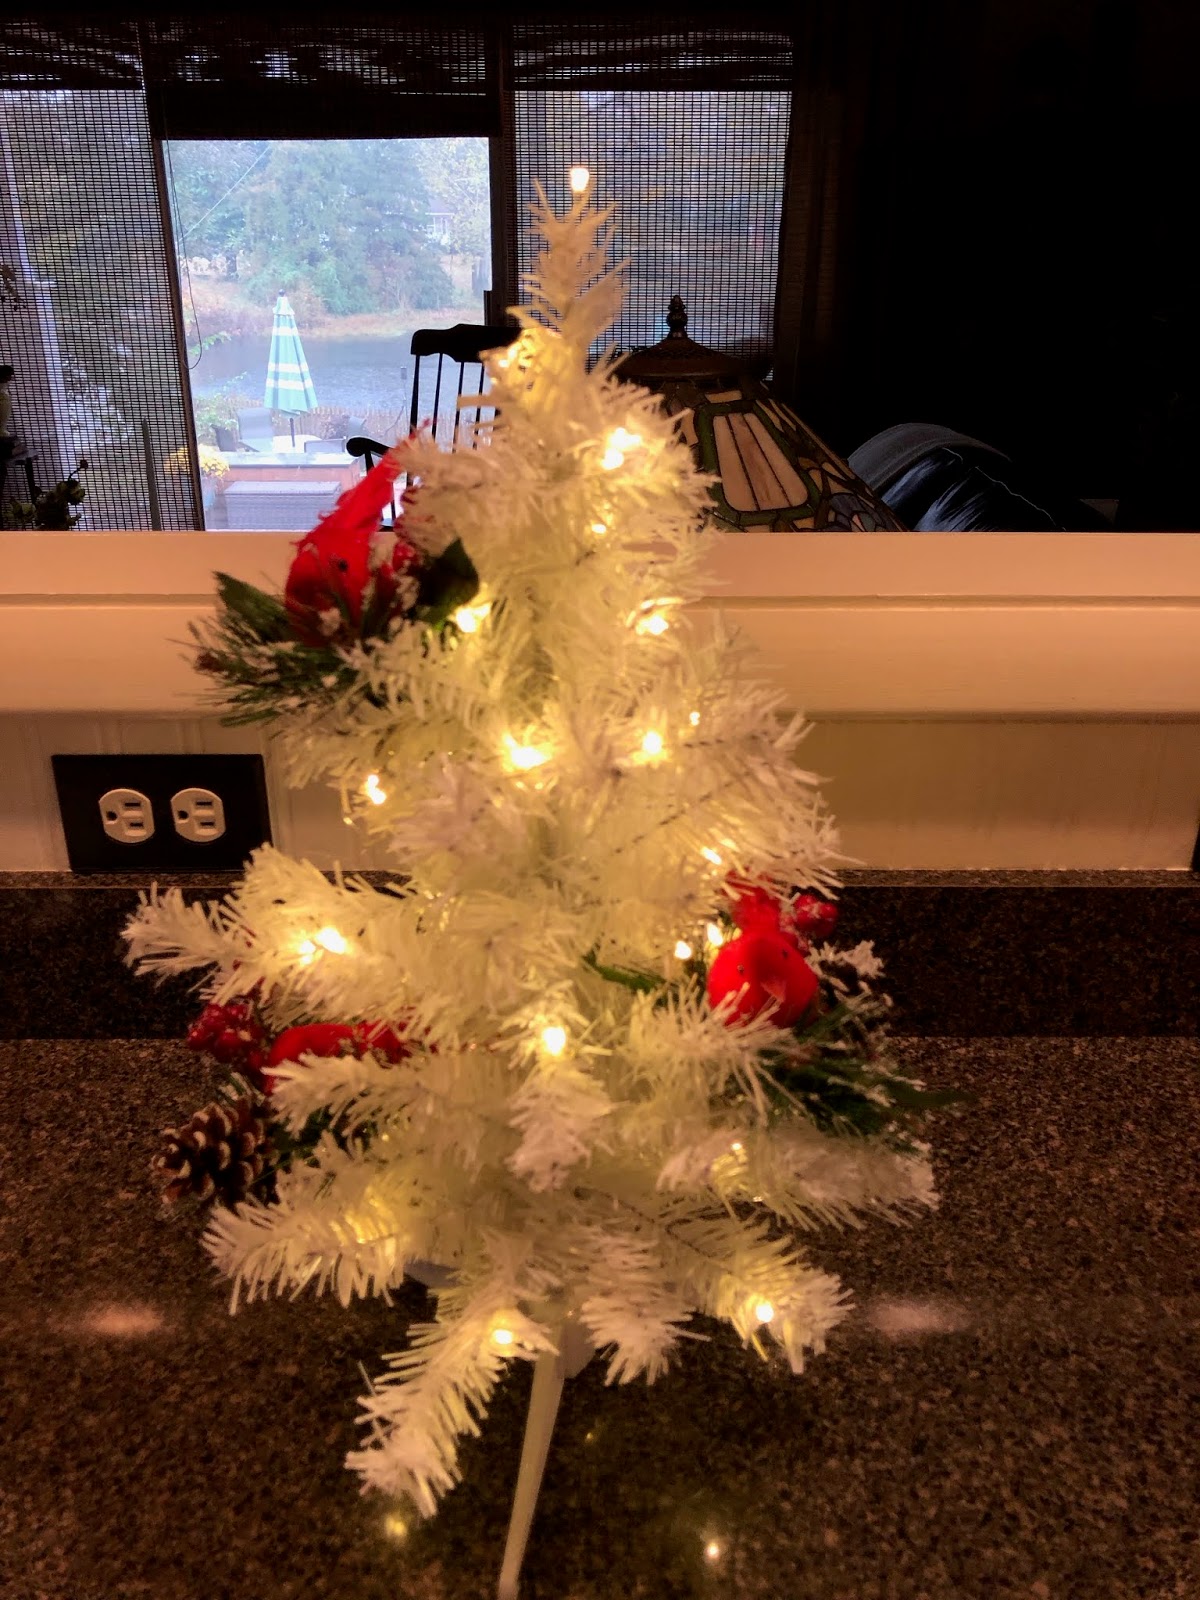
And once I had everything how I wanted it, including a red bow topper (again, Dollar Tree ribbon), this is what I created...

This bright and festive tree will be enjoyed by my dear M-I-L, her roommate, and her nurses and caregivers.
Total cost was $10! Two trees, 5 floral picks, 2 snowflake packages, and 1 tube of red balls = 10 Dollar Tree items.

So, let's talk a bit about why I hot glue small trees like these.
First, at the incredibly cheap price of making these trees, deconstructing them is a waste of time and energy in my book. When the season is over, a kitchen trash bag can be placed over the tree for protection and stored for the following season. Instant tree, done and ready!
Second, because the branches are shorter, if things are not attached, they tend to shift. As these are meant to be table top type trees, this can mean disaster if you are moving them to clean or shifting your decor from one place to another.
Finally, these trees are so easy, that they make GREAT gifts for just about anyone. In my situation, it will be decor for the nursing home room. Imagine it at a nurses station, or office desk, waiting room, or teacher gift. You could also create trees that are not holiday related. Using the Dollar Tree birds, butterflies, and dragon flies found in the craft section, you could make an amazing tree for a little girls room, or a baby's room. They could be used as wedding table decor or even a money tree for an anniversary or wedding shower.
If you have a business, you can use it for clipping on discounts that your customers can choose during sale events. For $1-2, you can buy them for just about any sale event you pick!
If you have a favorite "thing," like a football team, a hobby, or sport, you can create your own tree to enjoy year round. Image a beach themed, farm themed, or family photo themed tree (Dollar Tree has tiny frames that would be amazing to use for this). The ideas are literally endless!
Hit your nearest Dollar Tree, create a tree and attach it in the comments! I'd love to see what you create!
Stop back by on Tuesday to check out the tree I made my father-in-law, a tree I made for my own home, plus a "check in" on my Thanksgiving Planner post!
Have a Great Saturday!
BONUS:
I had some of the red balls left over, so back to The Dollar Tree I went and found these 15" wreaths. Again, they were a bit sparse, but 2 together would create just enough fullness for what I had in mind. I also grabbed a "bow" ornament.

I started by spreading the branches out and placing one wreath over the other one. I used a chenille pipe cleaner (Dollar Tree in the kids craft/toy area) to tie them together at the top where I would be placing the bow ornament.

Next, I brought two branches from the back wreath over the top wreath and just twisted. This "joined" them together.

When I had done that at 5 strategic points around the wreaths , I had this:

A nice, full wreath.
You could even add a third wreath if you wanted to, no problem.
I simply glued on the ribbon ornament and the remaining balls in groups of 3, and now I have a great wreath for the door to my M-I-L's room...plus, it matches her tree!

Cost = $3
The 2 wreaths and red bow ornament. The red balls were left over from the tree project!
Happy "Affordable" Holiday!


Post a Comment