Tuesday, January 29, 2019

Puppy "Pantry"

I don't know about you, but our sweet pup Dixee is the love of our (read Hubby here) lives.

With all of our children grown and out on their own, having our lemon beagle adds so much joy to every day living.  She's very spoiled and thinks her "daddy" hung the proverbial moon.

Last week as I was cleaning out our pantry, I decided to also give her pantry a refresh and new organization.


Her pantry is an IKEA wall cabinet (above the frig sized), hung a bit higher than traditional countertop height; over her feeding area.  It's in our laundry room right across from the human pantry.  I hung this cabinet with extra storage in mind.  Because there is not adequate space to place a base cabinet, and the heating would have to be moved, we opted to hang wall cabinetry instead.

TIP:  Think about where you could utilize a wall cabinet in lieu of a base cabinet.  They are shallower and can be mounted like I've shown here.  The top of wall cabinets tend to have a shallow space, or in this case, they have a flat top.  I used a piece of cut glass as a topper with some decorative wallpaper underneath.


I pulled all of the stuff out and placed it on the washer and dryer to assess what we had.

There were expired medication bottles and heart medicine.  Old treats that she didn't like.  Uneaten food that she didn't like.  Smaller collars that didn't fit from puppyhood.

Time to purge.


Everything was removed and the cabinet got a good wipe down with our Young Living Thieves cleaner.


I buy the concentrate in bottle form and mix it with water to make my all-purpose cleaner.  This bottle has so many cleaning options in it.  We use Thieves cleaner for EVERYTHING in our home.  It's people AND pet safe, so I don't have to worry about her ingesting it.


Next, I measured the interior width and depth of the cabinet so I could cut my lining.


I am happy to say this refresh didn't cost me any money as I had all the needed supplies.  The liner was leftover as was all the storage bins and baskets.


Once the liner was in place, it was ready to be restaged for maximum use.


I put her dog food in the hard acrylic bins that were already in her pantry.  I used the same shelf riser to maximize the verticle space.


I foraged in my organization stash our basement and found this small set of three drawers.  I cleaned it up with the Thieves cleaner and organized specific items in each drawer.

Using my label maker, I marked drawers for her Teeth, Grooming, and Meds.

Before, these items were just willy-nilly in the cabinet and tended to get lost and forgotten about.


I wanted a way to store her little bandanas, collars, and extra "poo" bags and remembered that I had a large container left from the lemonade I emptied into a plastic container.

I cleaned it out and covered it with leftover contact paper (Dollar Tree) and put the labels on the outside.


They fit nicely into the container and the height gave me more room in the cabinet as opposed to something that would be wider and flatter.


It fit in perfectly and the puppy pantry was complete!


We keep her Vera treats (aka "Cookies") in the large black canister on top of the pantry and the bags of treats are stored here for future fill-ups.

Her Jif Natural Peanut Butter also fit in there - it's a daily treat that leaves her salivating while we scoop out a spoonful...


Of course, Dixee was thrilled with her pantry re-fresh.

Can't you tell?  She can barely hold the excitement in!

She's a bit of a rule-breaker as well.


Saturday, January 26, 2019

Pantry Pick-Me-Up


My pantry needed reorganization.

Now, I know that many of you will not agree with me, because it did APPEAR to be well organzied.


However, from my persepective and need for function and "pretty," this pantry was missing the mark.

The floor area was slowly filling up.  Random boxes and bags of food were shoved into open areas.  Multiple bottles of the same stuff were open and at varing levels of empty.  Things were dusty and hiding dirt and crumbs behind them.

It was driving me crazy.

So I dove it and removed everything!


About 10 years ago, I had a mouse problem that almost sent me to the psychiatric floor of our local hospital.  I caught the culprit and then cleaned out the pantry thoroughly - because mouse droppings and urine can infect food, especially on cans and bags.

Less than a week later...more mouse evidence.  Repeat thorough cleaning after said mouse was erradicated.

2 DAYS LATER...yep, you guessed it...another mouse.

I was literally in tears from having to spend hours and hours cleaning and recleaning this pantry!

Seems there was a family and as each "scout mouse" was eliminated, another was sent out in it's place.

I was so tired of cleaning out this pantry that I fully DEMOLISHED that mouse family, AND THE ENTIRE PANTRY WITH IT!

It was my attempt at reclaiming my sanity.

I pulled off the old 1963 sagging wooden brackets and warped shelves (finding hundreds of mouse droppings behind the brackets and shelves - yes, I gagged the entire time), wiped down the walls, and then wall-papered them in a heavy duty vinyl wallpaper.


It makes the pantry totally wipable, PLUS, cans and containers do not leave marks on the walls now.

The wallpaper was from Lowes.  I believe they carry this type of paper still; near the curtain department.

I also installed a bracket and rail system for coated wire shelving which allows me to adjust shelving space as needed.  The only drawback are those wire shelving spaces.

The Dollar Tree to the rescue. (Did you have any doubt?)


If you have wire shelving and you don't like how things wobble or fall through, create shelf toppers with foam board and contact paper from your local Dollar Tree.  

Cut and cover to size per shelf and you've got wipable shelving at a low, low cost as compared to replacing with wooden or melamine shelves.

Once everything was wiped down and readied for the return of stuff, I did a bit of "triage" on the initial contents.

I started with the plastic containers.

We don't use plastic for leftovers in our house.  Instead, we use glass because it's "green" and easy to reheat right in the containers (minus the plastic lids).

I do however use plastic for the RV when we camp as well as sending food to our parents or with friends.  I keep a basket of them in our pantry for these situations.  However, I too end up with non-matching pairs and need to periodically clean it out.

BEFORE

AFTER


The Dollar Tree carries these small black frames that are perfect as labels for baskets.  I use my P-Touch label maker and some string to tie them to the baskets.  It's easy to change as needed.

Use the sting by tucking it behind the cardboard piece in the back.  You could also use hot glue.
Next, I wiped down each food item and checked the dates.  I was pretty surprised at how many items I had that were out of date.

Also, by going over each item I got a better idea of what I have in the way of food stuff and can plan upcoming meals around that, especially stuff that is close to it's expiration date.


I picked up some more containers (Amazon and The Dollar Tree) for a few of those items that were still in bags.

After my episodes with the mice, I realized that you can discourage them by not having "chewable" containers/packaging in your food areas.  Using solid containers allows you to have a pretty pantry AND keep critters at bay.  Once they realize that they cannot find food available, mice will move on looking for the next food source.

Containers CAN get pretty expensve IF you are not picking them up at The Dollar Tree.

Amazon periodically has them for sale on their daily specials, but I've also picked up many from Marshals and Home Goods.  I like The Container Store, but I think they are pricey, especially when you have access to lower priced, good quality containers.

Not all my containers match, but the overall asthetic works, so I'm happy.


I use my label maker to label the outside and then I cut off the directions for cooking and place it in the container.

Here are my grits in their new home.  When I add more, I will make sure to check the directions to see if they match the current ones.  IF NOT, I will place these grits in a baggie with their directions and place the new grits and directions in the container.  I will then place the baggie inside as well and use them up first.

At last is was time to put things back.


Up high I place items that I don't need as often.  I use these fabric bins to store things like lunchboxes, aluminum pans, and my immersion blender.


Items like my crock pots go near or on the bottom.  

Yes, I have 5 crock pots.  They are all different sizes, and YES, I use them all.

Between our RV life and easy meal prep, I find a crock-pot is a life saver.


Our glass storage is put at arm height for easy reach.  I bought this as a set, and see them quite often in my BJs.


Oils go on the door.  I peridodically replace the paper towling beneath it to keep oil residue at bay.


Finally, I started placing "like" things back in where I felt made the most sense.  It was a different placement than before, so I had to give hubby a "tour."  (I knew there would be confusion if I didn't.)

Four hours later...


What's the best part?

ALL THAT EMPTY SPACE!

I mean seriously...  It's like the best to see it there.  It feels so un-cramped!


Before - not so organized.

After - ahhhhhhh!

I did re-home some of our entertainment items.  If they were only used a few times a year, they went into the basement with their "friends."

The trick will be to keep this organization for a longer period of time then when I re-organized before.

I seriously have a rule-breaker in my house...
(not me obviously)


Saturday, November 3, 2018

Meal Planning 101 - 10 Tips to Success!

Did you know that current statistics show that the average American (each one of us) WASTES about a pound of food a day?

 A.  Day.

That equates into billions of dollars of wasted food just for our country alone.  For you, that can equate into a monetary value of $2200 per year/per person, or about $43.00 per week multiplied by the number of mouths you feed.  It may not seem like much, but think about where you could really use that money.

Like paying down college loans, saving for a car, donating to charity, Christmas cash, family trip, or... about 2+ deep tissue massage sessions a month.  (wink, wink)

No matter how you save or spend your money, do you really want to literally "throw away" $2200 per year?

How do you avoid this?

Easy.
Meal planning.
Period.
Plain and simple.

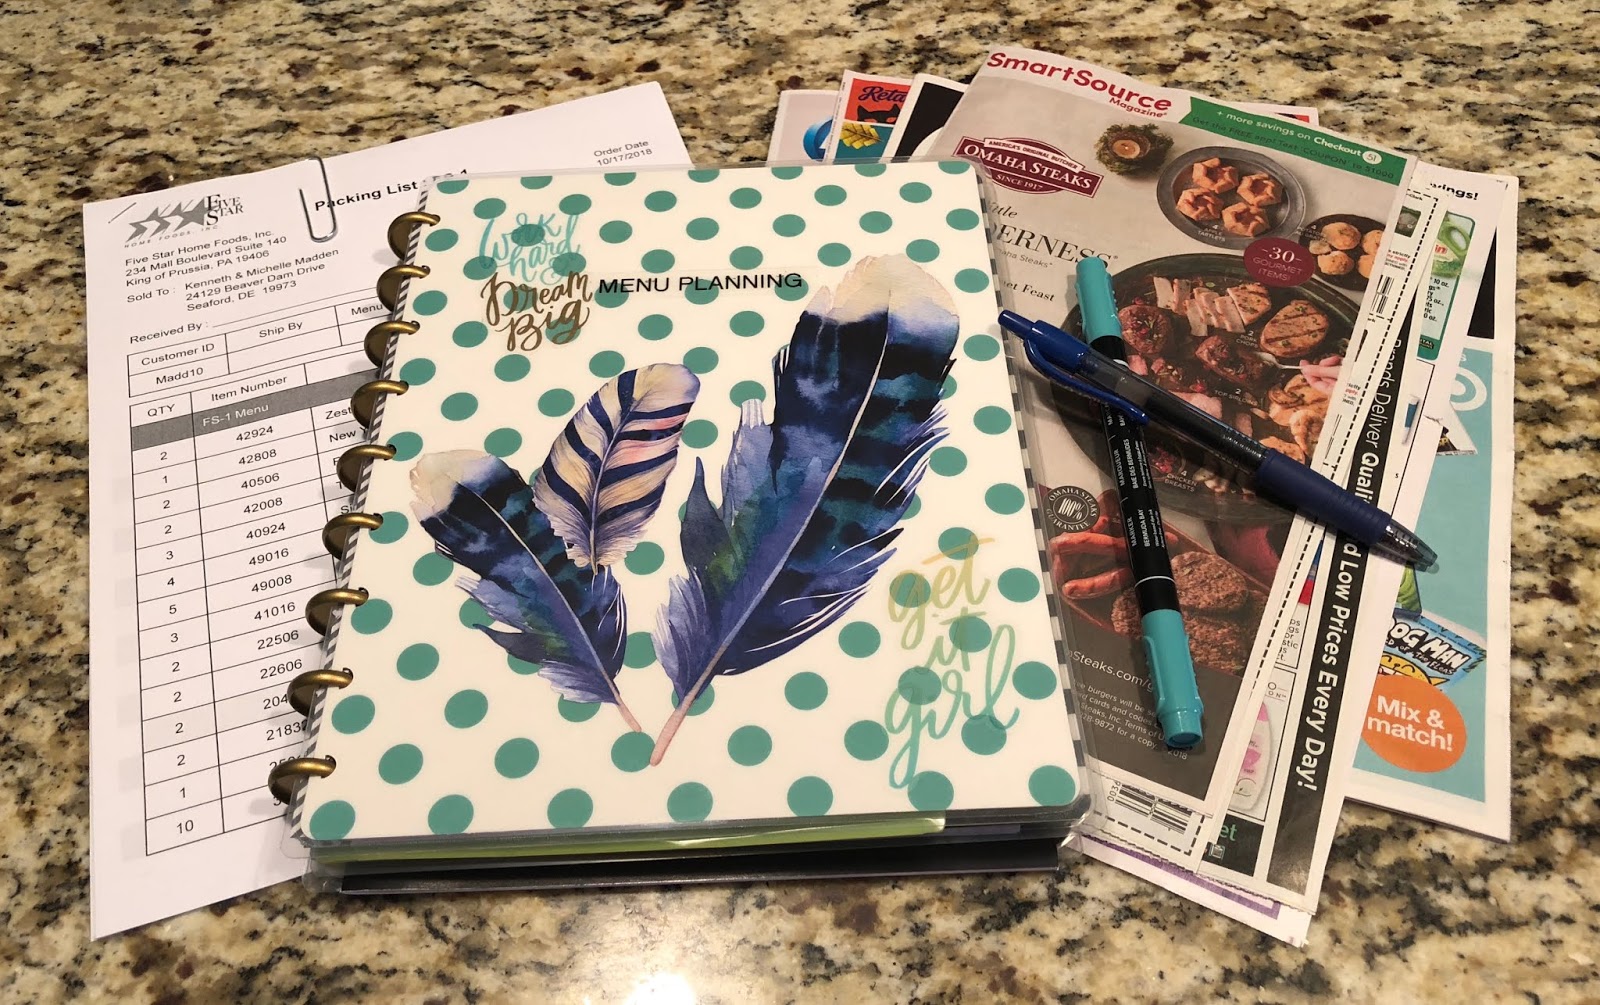
My Five-Star Freezer Inventory list, my Menu Planner book, and the current coupons from the newspaper.

Meal planning is not hard.  In fact, it's one of the most cost effective, easiest things you can do.  Even if you don't really care to cook MOST of us have to cook at least some of the meals in our home.  Meal planning can make that seem less of a chore and actually get every family member involved in the process of preparing and cooking food.  

At our home there are 2 people.  I know that many "retired empty-nesters" eat out, and we're no strangers to this.  However, I do enjoy preparing our meals, so I've developed 10 tips for meal planning that I'm going to pass on to you.

Tip #1 - Use a notebook or some organized system (can even be electronic) to plan your meals.  I like the disc systems so that I can create my notebooks; but really, a 3-ring or a Dollar Tree spiral will work just as well.  It's important to write it down.  You can keep your past plans here as reference, you can make notes on what recipes worked and what didn't, and you can also keep coupons in pockets or page protectors.  

Having all your planning stuff in ONE PLACE is the key.  It will make it easier for you to have everything at your fingertips.  

Tip #2 - Decide what meals you want to plan and how often you want to plan.  I plan every Sunday and we typically shop Sunday afternoon.  You can plan weekly, or every two weeks, or monthly.  Try different options to see what works best for you.  I do not plan for meals other than dinner.  Hubby and I get out of bed at different times so we usually don't eat breakfast together.  Some days we might have a late breakfast at a local restaurant, but it's not a planned event.  The great thing about eating breakfast (or lunch) out is that it's one of the cheapest meals you can buy when compared to dinner menus.  If you have a busy family, you can plan for the other meals, but for us it's easier to have breakfast foods and lunch foods always available in the frig or pantry.

Remember too that eating out is meal planning as well.  Just because you didn't cook it you did "plan" to go out.  You can use eating out as a treat for your family.  One night a week, even at a local pizza place, is a great way to have family time as well as teach your children how to eat and behave in public.  It is a learned skill people!

Tip #3 - Use a food program or buy in bulk if that works for your family.  We use a food service program through Five-Star Foods out of King of Prussia, PA, which provides us with top quality meats and veggies delivered every 6 months to our home.  We have a commercial grade freezer where it is all kept. The food is phenomenal.  We pay a monthly rate each month which is LESS than what we were paying monthly at the grocery store for the same products.  Our grocery trips are now for general things like milk, bread, dog-food, salad fixings and fresh fruit.

Buying in bulk can be great for those with larger families, especially if you need to always have certain staples on hand like pastas and peanut butter.  It can be more cost effective per serving as well.  Large bulk stores like Costco, BJs, and Sam's Club are great options.

Tip #4 - Think convenience and ease.  I use the crock pot A LOT!  I can start the meal in the morning and by dinner time it's ready to go.  Saves so much time and effort for me in the afternoon when I'm likely to "bail" on cooking. Over the years I've collected several sized crock pots.  The largest one is great for roasts and making large batches of soup that I freeze for future meals.  The smallest one is used mainly for our RV trips of Beanies & Weenies.  Insta-Pots are another great option although I've not really used mine other than once.  It's on my list of winter meals to try though. 

Here's how I plan...

I start by using my freezer inventory (provided by 5-Star) and my pantry inventory, my favorite cookbook, my Pinterest EAT! board, and some recipes that I have saved because they are easy as well as delicious.


Then I look over our week in my calendar.  When will be eating out?  What things are going on during the day that will affect the time I have to cook in the evenings?  What do I think we might be in the mood for regarding dinner?


I use this pre-printed menu planner which also has a fillable grocery list on the back.  You can purchase these or make your own.  Figure out what's best for you.


I fill out the nights were either eating out or unavailable for dinner at home, and then I start filling in my dinner selections.

Tip #5 - Take stock of what you already have in the way of meat, veggies, and dry goods in your cabinet.  Physically look into your pantry and cupboards and use them first!  This way you won't have things expire or go bad before you have a chance to use them.  If you have a pantry, make sure it's organized and you can see what you have.  If you have cupboard storage, make sure that it is organized by like dry goods.  For example, all soups should be grouped together, all pasta should be grouped together, and all sauces should be grouped together, and so on.  When things are hibbity-jibbity, too many things can get "lost" in the back of the cabinet and expire before you use it up.  This is a great waste of food!

Tip #6 - Vary your meat and meatless choices throughout the week.  For instance: here I've planned chicken, pork, baked potatoes, shrimp, and pasta with ground beef.  Our dinner out will probably include steak, so I didn't want to include steak anywhere else on the menu.

From here, I used my Pinterest pinned and printed recipes to find new ideas or staples for meals.  

Notice that there is NOTHING fancy here.  

The chicken is coated with egg and crushed French-fried onions.  The Carolina Pork roast is just a roast in the crock pot with a jar of Carolina BBQ sauce that I got 2 weeks ago with a coupon at the grocery store.  The fajitas I have as well as the rice and the meat sauce is a jar of sauce (again a coupon purchase) plus the left over meat from burgers that we had on Sunday night.

We also LOVE LOVE LOVE to have just baked potatoes (or sweet potatoes) for dinner, loaded with whatever we have on hand.  Of course butter, broccoli, lettuce, tomatoes, black beans... it can be specific, or not.  You can choose how to load your taters with what you have left over from previous dinners.  If we want a meat added, we can have some of the left over bbq pork roast.  Large baking potatoes are pretty cheap and a great way to have one meatless meal each week.

The trick is to think about what you have and utilize that for each meal.  This includes crossover meals - like the pork in your potatoes or the meat in the meat sauce from the hamburgers.


Once the menu is planned, I figure out what needs to be purchased from the grocery store.  Here was my list.

YES...this was all I needed to buy at the store.  We had the rest, and I was using many items that were already staples in my pantry like rice, spaghetti sauce, and pasta.

I then take the time to go through the coupons and see what we can use from them.

Tip #7 - Try to use coupons when you can. I am NOT a mega coupon shopper.  We don't use much of the dry good coupons like shampoo and dish detergent because I buy those products through Young Living.  However, I will use a coupon for all our paper products like toilet paper, tissues, napkins, and paper towels because they are expensive.  

I will also purchase items like spaghetti sauce, soups, BBQ sauces, taco kits, and dairy products.  I keep these staples in our pantry along with the regular things.  It's sometimes hit or miss with coupons, especially if I don't use the product.  However, I typically can save anywhere from $5 to $20 dollars depending on the size of the grocery trip by using coupons for what we do use.  

Read your coupons carefully.  They are usually pretty brand specific as well as total specific.  For instance, it might declare that you have to buy the Brawny Mega-Roll towels in the 12 pack bundle.  

You will need space to store 12 rolls of paper towels, however, look around and see where you have spaces that are under-utilized.  Look at top shelves in closets or under your bed.  If you get an especially great deal but don't have the storage room, split the final cost with a friend and then split the package.  It will save you money per roll.

I love The Pioneer Woman's cookbooks.  The directions are all accompanied with a photo.  I struggle to cook from a recipe where I can't see what the outcome is supposed to look like.  Do you have this same struggle?

Tip #8 - Have about 15 to 20 "Favorite" recipes that are your foundational meal choices.  Be realistic, you are not filming food episodes for Food Network.  You don't need to have something new all the time.  In fact, right now, if you created a list of the meals that you and your family really liked and ate, you might find that there are about 10 or more meals that can always be easily prepared and are sure crowd pleasers.  

Keep a LIST of these meals and simply rotate them from week to week.  Trust me, they will not get old because they are delicious and trusted.

Tip #9 - Teach others in your family to prepare the meals as well.  My hubby can prepare the baked potatoes and slip them into the oven an hour before.  He also makes a great spaghetti sauce from the jar with added ingredients, as well as a killer chili.  Teaching your children how to prepare food is a beneficial life-long skill and can also build their self-esteem.  If you make it a family project it becomes so much more fun and less of a chore, plus it adds up to quality family time!  Do some internet research to see what chores and responsibilities to give to children at different ages.  Make sure you or a trusted adult are there to supervise possibly dangerous tasks like cutting and stove usage.

Tip #10 - Keep an up to date inventory of what you have in your freezer.  It's not hard to write down what you have it just takes some time.  This is another great chore to give to children.  It helps them with their reading and writing skills along with counting skills if there is more than one of that item.

An inventory is especially helpful when planning so you know what you have on hand and don't need to purchase at the store.  This can be especially beneficial if you are trying to save extra money during a particular week.  Use what you have and you won't have to spend more at the store.

So, let's review the tips:

1 - Have a written or electronic system.
2 - Set a timely day to plan and follow through.
3 - Try a food plan or buy in bulk if possible.
4 - Use convenience appliances when possible.
5 - Use what you have first.
6 - Vary your menu by meat/meatless choices.
7 - Use coupons when possible.
8 - Have a set of foundational meals.
9 - Make it a family affair.
10 - Keep an up to date inventory.

Give yourself this gift and give yourself some grace when starting to meal plan.  Figure out what works for you and run with it.  You will love meal planning and you will save money; which is always a win-win!

Bon Apetit!


Tuesday, May 7, 2019

RV Living

When I was a child, my parents purchased a gently used travel trailer.  They took that trailer to a local RV park near Fenwick Island, Delaware, and we officially had a beach getaway.

In fact, that trailer was eventually replaced with a new one and I spent several summers living in and working at the local beaches in both Delaware and Maryland.  I spent my summers honing my waitressing skills and saving money for the winter months.

Living in an RV was easy for me.  I loved it, especially as I became a college student and was able to spend much of the time there on my own.

Fast, fast forward to present day.

Hubby and I have our own RV, however, this one we pull to different places along the east coast, enjoying retirement in our home away from home.

I want to take you on a little tour of our RV and show you just HOW EASY it is to "glamp."  Along the way, I'll tell you the reasons we love having our "getaway" on wheels.

Photo credit:  Grand Design


Photo Credit:  Grand Design

This is not the first RV we purchased.  We had a Class C (drivable camper with a truck front) for a little less than a year when we traded it in for this Fifth Wheel model.  We also purchased a Ford F250 to pull it.

As you can see from the image above, the RV is spacious, especially with the 3 slides that open up the living and sleeping areas.  Because the living area is in the back of the RV, the ceilings are also higher than up the stairs into the bedroom.

What drew me to this design especially was the island and hutch area in the kitchen.  I loved the finishes as well.  The rustic flooring and beaded paneling accents added to the charm and my design style.

Want to see inside

Welcome to our Home on Wheels!


Here is what you see when you first enter.  My large island, the bead-board paneling, and the hutch.  Yep, that's solid surface countertops and a 4-door refrigerator.  I have a 3 element gas stove and oven with a micro above.


I was able to shop my house for decor items, pulling in rustic accents and adding my little fox touches.  Of course, we have YL diffusers just for the RV as well.

The green glass cookie/snack jar was my grandmother's.  I love having it in the RV.


Years ago, I had found these companion pictures at a local antique store.  I had never hung them anywhere, so they stayed stashed in a cupboard.  When we bought the RV I knew they would look perfect on the wall of the hutch.  In fact, their colors set the tone for the colors in the rest of the RV.

I have found the Command hooks have held EVERYTHING very well in our RV.  We are heading into our 3rd year, and not once has anything fallen off our walls.


Another item that I pulled from my home was a few of the Longaberger baskets I had collected over the course of 20 years.  If you remember, these baskets were all the rage.  The company has since closed, and over the years I've sold and/or auctioned many of my baskets.  However, I did keep the ones that were very functional, like these here.  

When we are traveling down the road, these are stored under the sink.  They take the motion very well and done add any weight to the overall RV.


By the sink I keep lotion and dish detergent in these jars, sitting on top of a rustic cutting board I scored from Marshals.  


One of the best things about this model is the pantry.  Behind this door is a floor to ceiling pantry that holds so much stuff.  I often travel with a crock pot, foodstuff, trays, Ninja blender, toaster, etc...  This pantry has loads of storage and lipped shelves to keep things from rolling forward.  I have several different Dollar Tree bins and baskets inside which also help to steady things and keep them organized when camping.


Across from the kitchen is our dining area.  The table used to be turned the other way and there are 4 chairs available.  We decided to turn the table lengthwise and leave a pair of chairs at home.  When we are camping, we tend to eat lunches out and dinners at home.  If the weather permits, we always eat outside.  This table gets more use for writing than it does meals!


In the large living area is our seating.  This couch turns into a bed.  Stored underneath is the mattress topper (because most pull outs are not that comfortable).  Stored above are the extra sheets and a blanket.  

You can see that I do pull out several decorator items.  I found a storage ottoman at TJ Maxx.  It doubles as a coffee table, but more importantly, it stores most of the decorative items when traveling.  


Next to the sofa are a pair of reclining chairs.  I usually sit in the far one.  The pup usually lounges in the other.  We even have a fuzzy rug we place there for her to sleep on.


Next to the pantry is our large TV and electric fireplace.  Yep.  This RV has a fireplace.  

Many RV parks have cable hookup.  We also have a built-in DVD player.  We typically bring around 20 or so movies with us when we travel.  We have a traditional movie we watch each time (weird I know, but it's something we enjoy) and then we watch the others if the mood strikes us.

I use Dollar Tree bins to organize the movies and many other things in the cupboards and drawer here.


In the hallway, going up the 2 steps, I placed 2 wooden inlay box tops that were originally my sister-in-laws.  I love the rustic feel of these, and love that they have a family history.


The bathroom, though big by RV standards, is hard to photograph.  I did want to share a shot of the sink area with the peel and stick vinyl tiles above the sink. (I also used these above the stove.)  Many RVers have used these peel and stick as well as real tiles when "upgrading" their RV interiors.


Another aspect of this model that really caught my eye was the built-in dresser with 7 drawers.  Because space is limited in an RV, when you have the ability to store things in a compact way without adding too many additional pieces, you're golden.

I've added a few decor items, including this Goodwill brass lamp that I thrifted.


I wanted the lamp to be ambient lighting as there are lights built into the ceiling already.  This lamp stores easily when traveling and is the perfect height for the dresser.  What you cannot see here is a set of overhead cupboards - perfect additional storage for the bedroom.


In the front of the RV, in the part that has the hitch below and hangs over the truck bed is our walk-in closet.  We've used this hanging shoe unit (Wal*Mart) to organize our shoes; it provides easy access.  It also separates our clothes towards the sides.  

This closet is large because it also has hook-ups for an RV grade washer and dryer.  We don't plan to have one simply because there are usually very nice laundry facilities at the campgrounds where we've stayed.  This also leaves us copious amounts of storage to the right and left of the space.  There are removable shelves there and I also have some plastic containers with items like beach towels and extra blankets.


On the only wall available, I placed brown vinyl branches (Amazon) and a photograph of 2 fox cubs that we purchased at an art show while visiting Vermont last fall.


Finally, the bed (which is on a spring lever and has storage underneath) has a Wal*Mart duvet cover in a soft coral, complete with pillows that I made from fabric that I already had.

Traveling and living in an RV is one of my favorite things to do.  It allows us to vacation anywhere we want on the continent while saving loads of money at the same time.

Cost per night at campgrounds vary, but on average, it's around $50 per night.  You cannot find a hotel suite (because that would be the equivalent to an RV) for that kind of money.

I also get to pack and unpack my belongings right in my own driveway.

We can also save money on meals because we cook while camping.  Our meals are usually pre-planned, and we've developed some tried and true options that are our staple meals when on the road.

It's never "roughing it" when you have an RV.

Plus, I'd never break my own personal rule of sleeping on the ground in a tent...

I'm just not that kind of gal!

Happy Camping!


© No Rules after 50. Made with love by The Dutch Lady Designs.