Tuesday, December 4, 2018

Building a Charcuterie Board

Our daughter has always love to cook and create in the kitchen.  We've encouraged this love of cooking because it's a skill that only improves and is a valuable one in adulthood.

Lately, she has been very into building a charcuterie board of various foods.

So...what is charcuterie?
First, it's pronounced shahr-koo-tuh-ree. (It's French)

It is the art of preparing meats (usually smoked types) like bacon, ham, or salami.

A charcuterie board most often consists of a variety of meats and cheeses and maybe fruits or nuts.  It's essentially a meat and cheese board.

However, you never have to limit yourself with your food choices, and since this is a blog about breaking the rules, I think you can make a charcuterie out of anything you like to eat.  Think desserts, cheeses and crackers, etc...

But, this post is not about beautifully designed food on a tray, it's about the tray itself!

In our many phone conversations (she lives 6 hours away from us), she has talked about her love of charcuterie.  I decided that I needed to "build" her an actual board to use as a display for her food combinations.

I researched a variety of sites and found that any wood that could be varnished with Formby's Tung Oil Finish would be a good selection.

So, off to Lowes I went to purchase an Oak Project Board and some kitchen cabinet handles and tung oil.  I ended up purchasing 2 boards and 2 sets of handles so that I could make one for myself as well.


This project is so easy and quick.

First, remove all the sticker tags from your boards and sand the edges with a heavy grit sand paper.  You can use a hand sander, but I didn't for this project.  Oak is considered a hardwood - meaning that it's not easily dented or broken. I started with a 50 grit and eventually moved up to a 220 grit.


DIY TIP:  The higher the number on the sandpaper, the finer the grit.  
For heavy sanding and stripping, you need coarse sandpaper measuring 40 to 60 grit; for smoothing surfaces and removing small imperfections, choose 80 to 120 grit sandpaper. For finishing surfaces smoothly, use a super fine sandpaper with 360 to 600 grit.


Once you are satisfied with the smoothness of your board, you can choose to add "feet."  I wanted the board to be raised slightly so that when the handles were added, the screws on the bottom would not scratch any table surface.  Plus, a bit of height adds to the presentation of the board in general.


I used my trusty Gorilla Glue to glue two feet to the bottom of the board.  I made sure that each foot was centered from right to left as well as the needed distance from the end.  I let the glue dry.  At this point you could use screws or brad nails to attach the feet as well.  However, since this board will be hand washed, I didn't feel it was necessary.


The tung oil was applied with a clean soft cotton cloth.  I applied 3 layers, letting them dry overnight between each layer.  I also did a light sanding with a 220 grit sanding block in between layers.


Once I was satisfied with the board, I added the handles.  Since the handles were the more modern long ones, I needed to create a template for drilling the holes perfectly.


I used a scrap of lathe strip to mark the hole placement directly from the hardware.  I then used my measuring tape to position it on the board with exact measurements from side to side and end edge.  I marked the holes and then drilled through to the back.


I then attached the handles using the shorter of the two screw pairs provided in the package.


And it was done!!!

Since our daughter came home this weekend to celebrate Christmas, we gave it to her.  She loved it!  

She got right to work creating a charcuterie for us as our Friday night dinner.


It was perfect!  We had a great time sitting at the table and talking, while picking and choosing among the great items she had on the board.

3 types of cheeses, 2 meats, some fruit, olives, fig spread, and nut brittle was a delicious combination of sweet and savory.  

The board cleaned up so well with just a mild dish soap.  The raspberries left a pink residue which worried me until I washed it and it came right off.  I recommend towel drying it immediately after so that you can protect it from water residue, just in case.

I have not made my board yet, but I will get to it sometime soon.  The boards are the same, but the handles are more in keeping with my style - less modern in style.

This was an easy DIY, and only required a drill if you don't add the feet (which I cut with my circular saw).  You could easily add small rubber feet if you didn't have a saw to cut the feet at home.

If you're not into charcuterie, it still makes a great tray.  Use it for any food service you want!  

Break those rules!


Saturday, December 1, 2018

Porch Refresh

I'm finally revealing the porch refresh today!

Although the porch "season" could be called officially over, I still want to show you some before, during, and after pictures.

So let's start from the beginning.


Our porch is an extremely small room, right off from our dining room.  It has 3 panels of glass between the two rooms, with the side panels stationary and the center panel a slider.

Over the years we've laid ceramic tile to the concrete floor, painted the moldings, and added 3 season vinyl tech windows.  Although it's small, it's a great place for reading, napping, and enjoying the back yard view.  It fits 4 people comfortably, so it can become an after dinner spot to relax and enjoy dessert and good conversation, weather permitting.


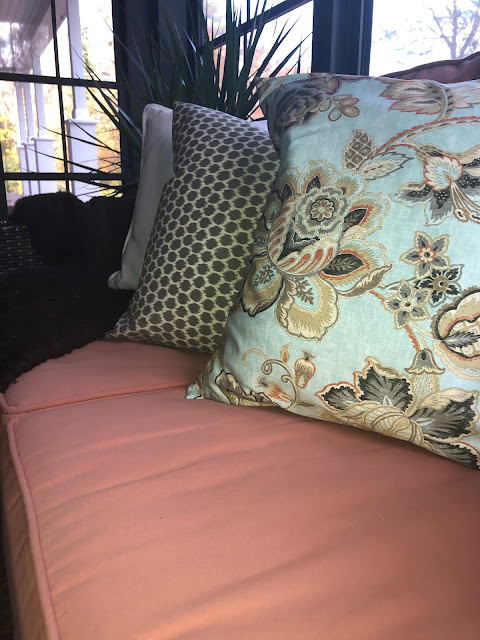
This L Shaped couch came from Wal*Mart many years ago, and the terra cotta colored cushions have lasted through many years of wear.  Eventually I will have them recovered, but that will only be after they have worn out.  I still really like this color!


We have a door that exits to our covered patio and then down to the decks in our backyard.


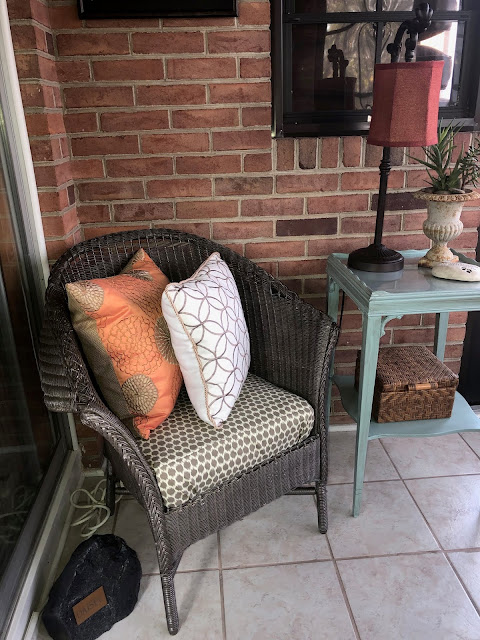
I have an antique wicker chair that belonged to my grand mother and a side table that I purchased from a local antique shop.


This room is fun and cozy and we use it a lot.

But, I knew that I needed to refresh the pillows, which I did with an easy sewing technique
I also wanted to introduce a new color (turquoise) as well.

So this fall, out came all the furniture for a deep clean of the windows and floor.


I started with the windows, knowing that the floor would get dirty from cleaning all the panes, window sills and tracks, and of course the framing.

These windows can accordion up or down, and be totally removed for cleaning.


Vinyl windows must be cleaned with a vinyl cleaner to preserve their quality, which means lots of spraying, wiping, and buffing.  It take me about 6 hours to deep clean these windows each season.


Rain water will create these ugly spots, which are actually dirt...


See here...it's really dirty!


All the tracks needs to be cleaned of the dirt, dead bugs, and surrounding cobwebs.  Look at how messy the floor gets below the windows.  Ugh!

 Once each window section is cleaned, I use a silicone based lubricant to grease the tracks so the  windows can slide easily up and down.

If you don't clean the dirt in the tracks, when it gets wet it acts like a glue and can actually "stick" your windows in a position where they won't move at all.  You then have to use a rubber mallet to loosen them...ask me how I know.


But, all the hard work is worth is when you have a crisp view of the outside.


While I was cleaning inside, hubby was spraying down the furniture to get any dust, cob webs, and little critters removed.  He also sprayed the cushions with my thieves linen spray and let the sun do it's magic.  A bit of sun will help to freshen cushions.  It's the same reason line dried clothes smell so great!


Here was the arsenal of supplies we used.  My homemade thieves cleaner, 2 full rolls of paper towels, WD-40 silicone lubricant, and PGT vinyl cleaner.


Once the windows were done, I scrubbed the floor and brought in a new sisal rug.

The cleaned furniture, new pillows, new table build, and some accessories finished out the refresh.


I made the tray from scrap wood then painted it to match the new table as well as an old table I repainted.

I had Lowes cut some acrylic toppers for both tables and the tray.  It helps to protect these surfaces when I have plants or beverages there.


I added another throw for use when it's a bit chilly out there.  We have an electric heater that we can put out there to help ward off the chill when it's not too terribly cold outside.


I recovered the cushion in my wicker chair, and here's the original table that I repainted.

The "rock" to the left of the chair holds the remains of our sweet Daisee dog.  We have another "rock" on this porch as well.  It holds the remains of our goofy Dash dog.


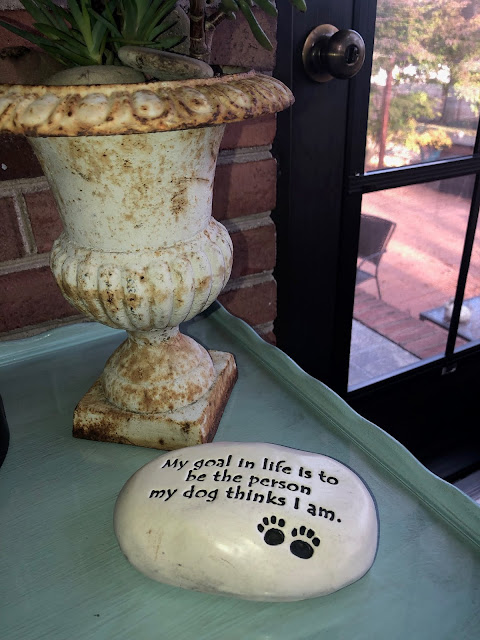
This was a gift to my hubby.  It's very appropriate.


Here's a close up of the tray with the acrylic topper.  I highly recommend adding acrylic or glass to the tops of furniture that you want to protect.  It's a minimal cost for a big return.  Measure carefully and take your measurements to your local hardware store and they will gladly cut either for you.


You can see that the new fabric brings out the terra cotta colors, but with a focus on the soft turquoise.  I love this fabric and the coordinating clay and creme fabric really works well.


Another throw allows both of us to be out here in cooler weather.  Plus, throws give any seating a cozy vibe.


I was able to keep this great tulip "painting."  It was purchased from Marshals about 10 years ago.
I still liked it and didn't want to replace it quite yet.  I works well with the new fabrics.

 It doesn't take much money to "refresh" a space.  A good cleaning, some paint and fabric, and a bit of elbow-grease can make a big impression on a tired space.

Do you have areas that need a refresh?  What would you like to change if you could?

I hope this inspires you to make those changes!


© No Rules after 50. Made with love by The Dutch Lady Designs.